With superzoom cameras, sometimes less zoom means better details
Learning to make better wildlife photos with Superzoom and Bridge cameras
Same hawk, same tree, same camera, same time of day, and same photographer - 3 different looks
| 539 mm (3000mm equivalent) | 324 mm (1800mm equivalent) | 324mm cropped then enlarged and sharpened in LibreOffice |
|---|---|---|
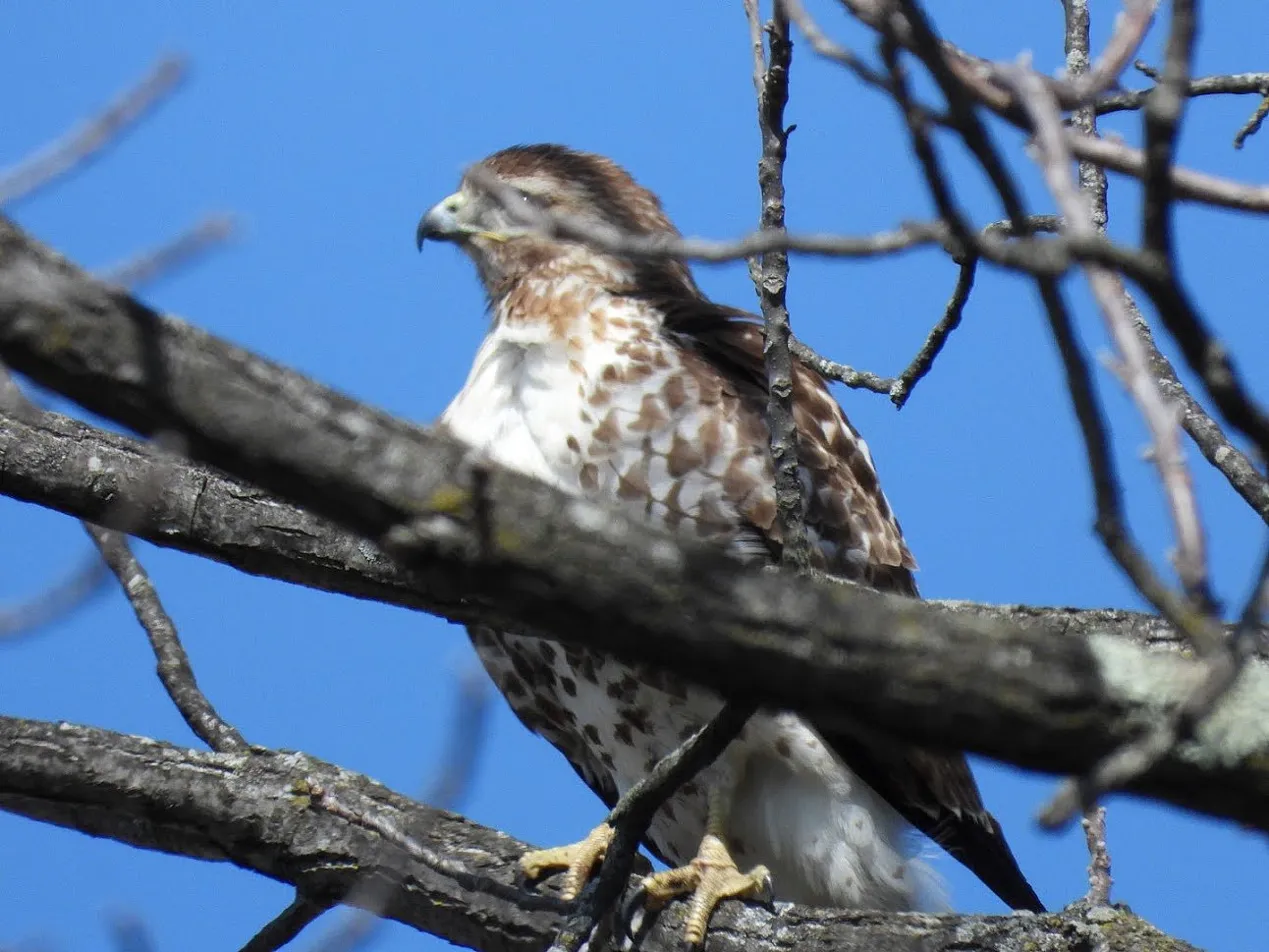 | 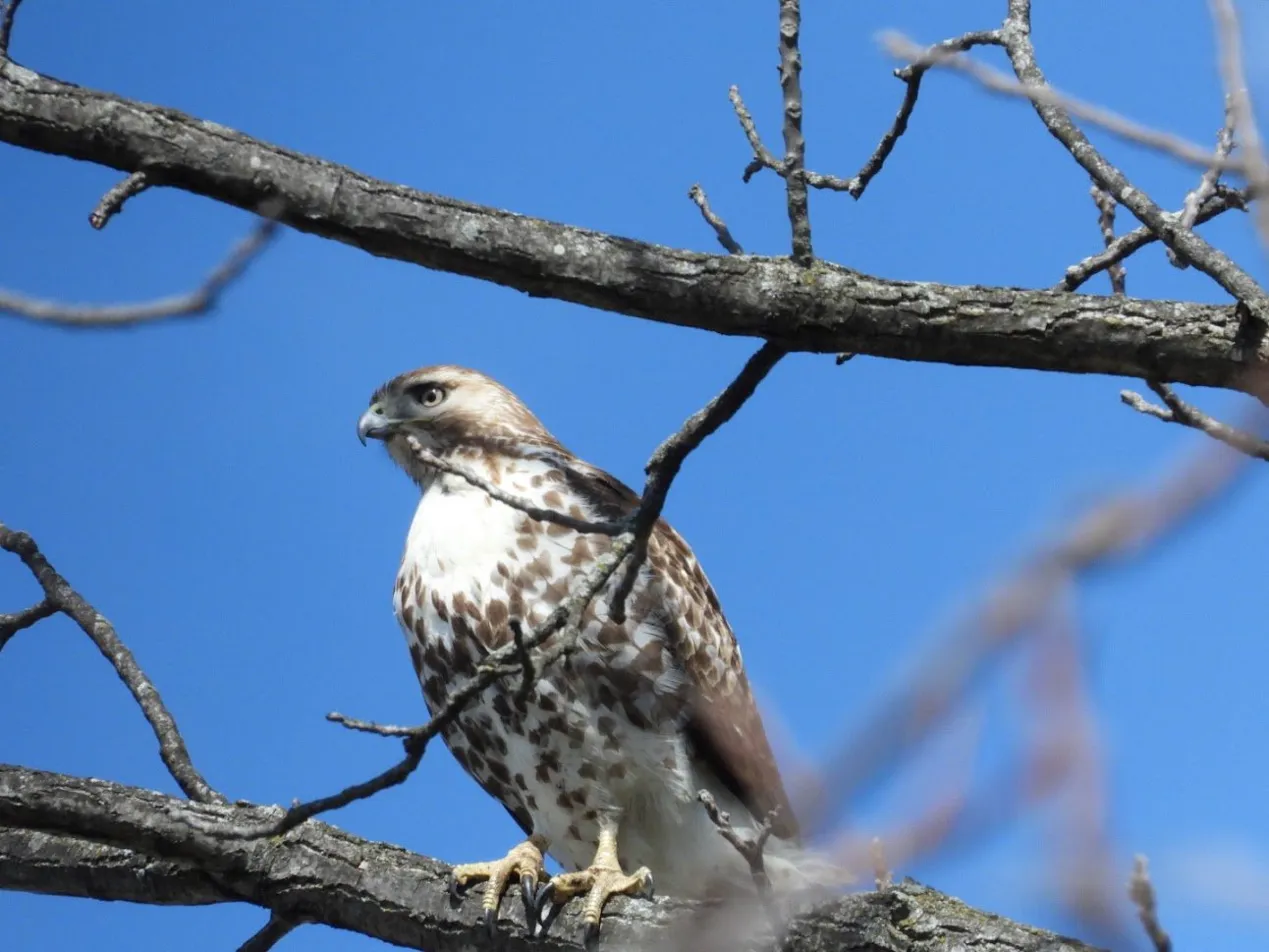 | 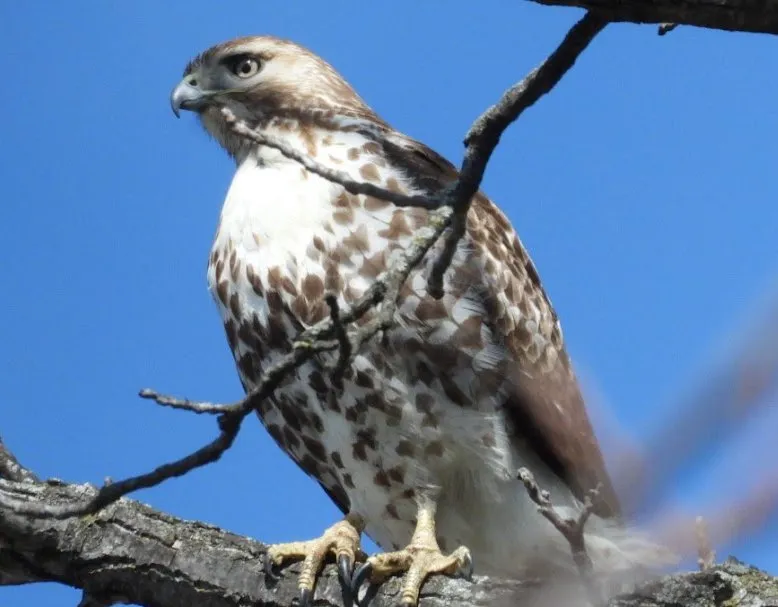 |
Magnification and Compression
One of the things that has puzzled me since I began my photography hobby a couple months ago is the difference in quality when comparing photos at a modest distance from a 35mm camera with a high-quality zoom lens vs. a Bridge camera like my Nikon P1000.
The Nikon zoom is described as "3000mm equivalent for a 35mm", but it's clear that it is very limited in the ability to produce high quality photos with a moving subject at a modest distance. There's no way that this camera will produce photos like the ones I see at the Conowingo Dam Eagles Facebook page. I knew this before I bought the camera - the purchase was a compromise between cost and quality for a novice photographer, but I have had difficulty understanding why a camera with "3000 mm equivalence" would struggle to match one with a 600mm lens.
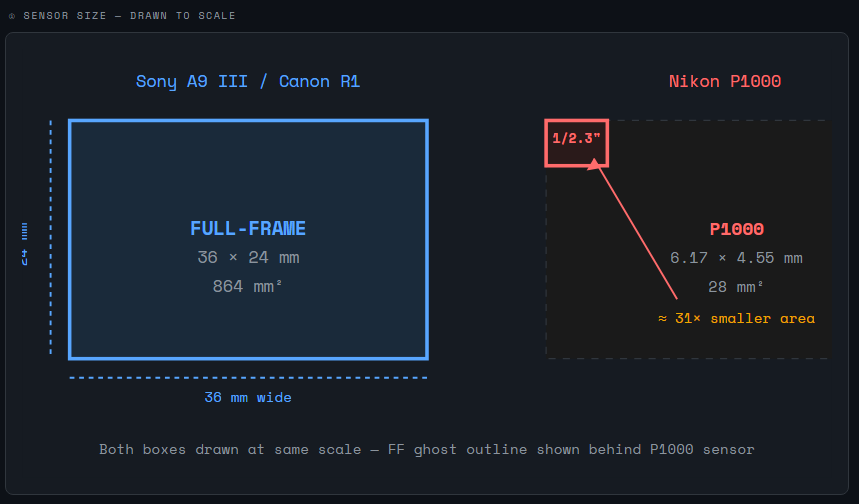
It turns out that there are a few reasons for the difference, but it mostly boils down to the size of the sensor where the light turns into pixels. After conversations with Gemini and Claude, I think I'm starting to understand. This diagram from Claude starts to illuminate the distinction.
Basically, there are two forces at play: magnification (zoom) and compression. The superzoom camera excels at magnification, but it compresses the full field of view onto a sensor that is only 28mm2. In contrast, the 35mm camera compresses its field of view onto a 864mm2 sensor. So, even though the 600mm lens has much lower magnification, the photographer with a 600mm lens can crop their photo to a much smaller size and still retain more detail in the cropped image than the superzoom retains by default.
Also, two side-effects of the small sensor and high magnifications are: (1.) the superzoom camera has trouble dealing with low-light scenarios at high zoom; and (2.) it is much more difficult to keep a moving object in the lens at high distances.

On the other hand, the Superzoom excels at magnification (zoom). Claude calls it a "superpower". As an example of this, I doubt if a 35mm camera could have made this photo, with the easily readable underbelly on the plane. At 3000mm equivalent, the P1000 has 5 times the magnification of a 35mm with a 600mm lens. According to Gemini, "To get that same readable 'DELTA' text on a 35mm camera, a photographer would need a lens that is physically about 4 feet long and weighs 30 pounds."
If you have a stationary or (relatively) slow moving object at a very great distance, I think this camera will stand with the best. The AIs describe it as a "camera with a telescope".
What does this mean for wildlife photography with a superzoom?
As I was conversing with the AIs, I was learning that it's standard operating procedure for professional wildlife photographers to crop their photos, then enlarge the cropped photo, and then sharpen the final result. This is why those photos at the Conowingo Dam all look so zoomed in. The raw photos aren't really zoomed in that far, but the photographers have removed the irrelevant sections and enlarged the pieces that remain.
It turns out that you can do the same process with the superzoom cameras (see the three photos at the top of this post). Doing this offers three advantages: (1.) It's easier to keep the animal in the lens when it's moving; (2.) It's easier for the autofocus to grab its target; (3.) The f-stop stays open wider, so more light gets to the sensor.
In a lab, with a tripod and a stationary target, there's no need for this extra work. With moving subjects and unpredictable lighting, however, the extra work turns out to be worthwhile.
According to Claude and Gemini,
- The simple formula:
crop % = shorter focal length / target focal length
So, if I take a photo at 1500mm equivalent zoom, I can almost match a 3000mm equivalent photo by cropping the photo to 50% (length and width), then expanding the cropped photo back to its original size, and then using a filter to sharpen it. Add in the fact that it's easier to keep the animal in the lens and that the aperture is letting more light to the sensor, and the 1500mm adjusted photo might well be superior.
According to the AIs, this technique makes the most sense in the zoom range between 1600mm and 2200mm equivalents.
Here are those photos again, as a demonstration:
| 539 mm (3000mm equivalent) | 324 mm (1800mm equivalent) | 324mm cropped then enlarged and sharpened in LibreOffice |
|---|---|---|
| | |
When to use max zoom
Of course, there are still some reasons to use the maximum zoom instead. One reason is when the subject is very far away, the smaller zooms just won't get enough pixels from the target.
Another case is when the lighting is very bright. In this case, my flow has been to take photos at 1000mm equivalent, then 2000mm equivalent, then 3000mm equivalent. This way, if the 3000mm equivalent shots don't come out for whatever reason, I have the 2000mm equivalents available to scale up by editing. Of course, if the animal is moving quickly, this sometimes means I don't have time to get to 3000.
I'm sure there are other reasons, but these are the main ones I'm aware of. Magnification is the superzoom's signature feature, so you definitely want to make use of it, but when conditions are less than optimal, this alternate workflow can make a big difference.
Conclusion
Although I bought the P1000 as a compromise between cost and quality, it brings some advantages with it, too. The camera is relatively light weight and mobile. Instead of carrying bags full of camera equipment, all I need is a single camera, so it is actually fairly convenient.
My biggest challenges to date have been that photography in limited lighting is difficult, and it is very difficult to keep a moving animal in the lens at high zoom. Under the right circumstances, this alternate workflow that I've started to adopt can mitigate both of those challenges: crop the photo at lower zoom, enlarge the cropped photo back to the original size, and then sharpen it.
Thank you for your attention!
All photos above were taken by me with a Nikon P1000 camera. I'm sharing them under the CC BY 4.0 license (share & adapt freely with attribution to the original source).