SHOW YOUR SKILL TALENT TIME 👉 ART, INNOVATION, HANDMADE, UPCYCLING, PHOTOGRAPHY, POETRY & MORE
Greetings, amazing Steemians!
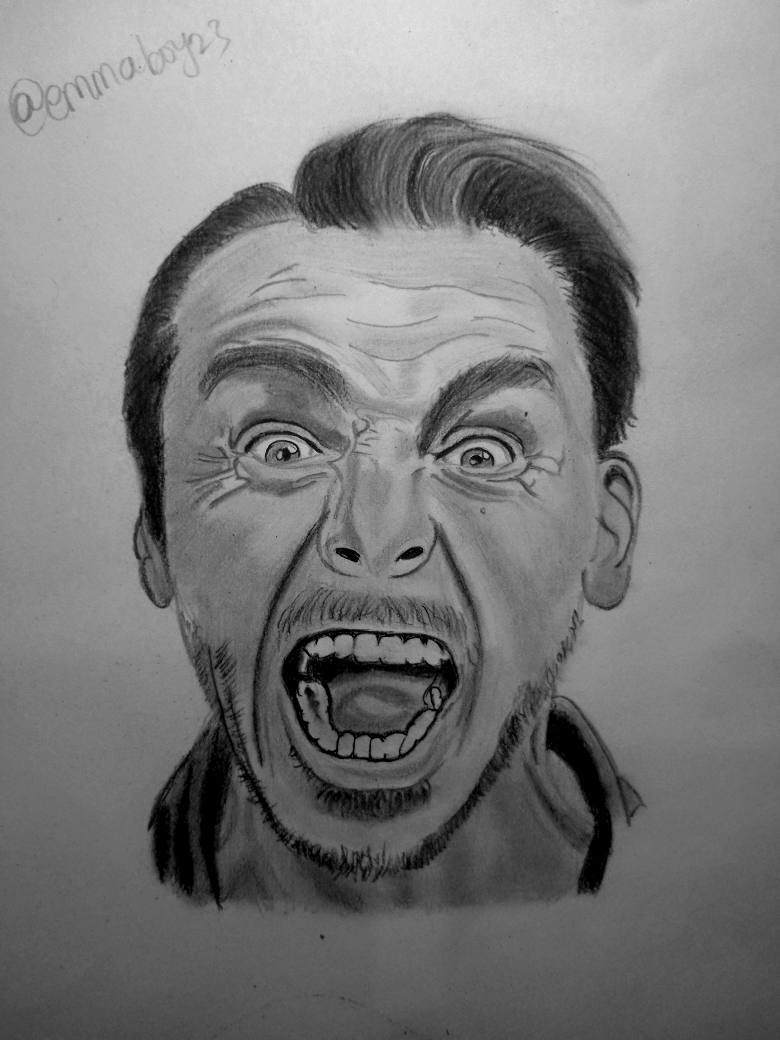
I humbly welcome you all to my blog once again, and I hope you all are having a splendid day. Today, I am excited to share my latest pencil portrait entry for the contest New Contest Week 103 // Show Your Skill...Talent Time 👉 Art, Innovation, Handmade, Upcycling, Photography, Poetry & More, organized by @mesola. For this week’s challenge, I decided to create something intense and emotional instead of a calm or smiling portrait. I wanted to test my ability to express strong human feelings through graphite shading, facial structure, and dramatic expression. For this drawing, I created the portrait of a screaming man using graphite pencils, and I will be sharing the step-by-step process I followed in creating it.
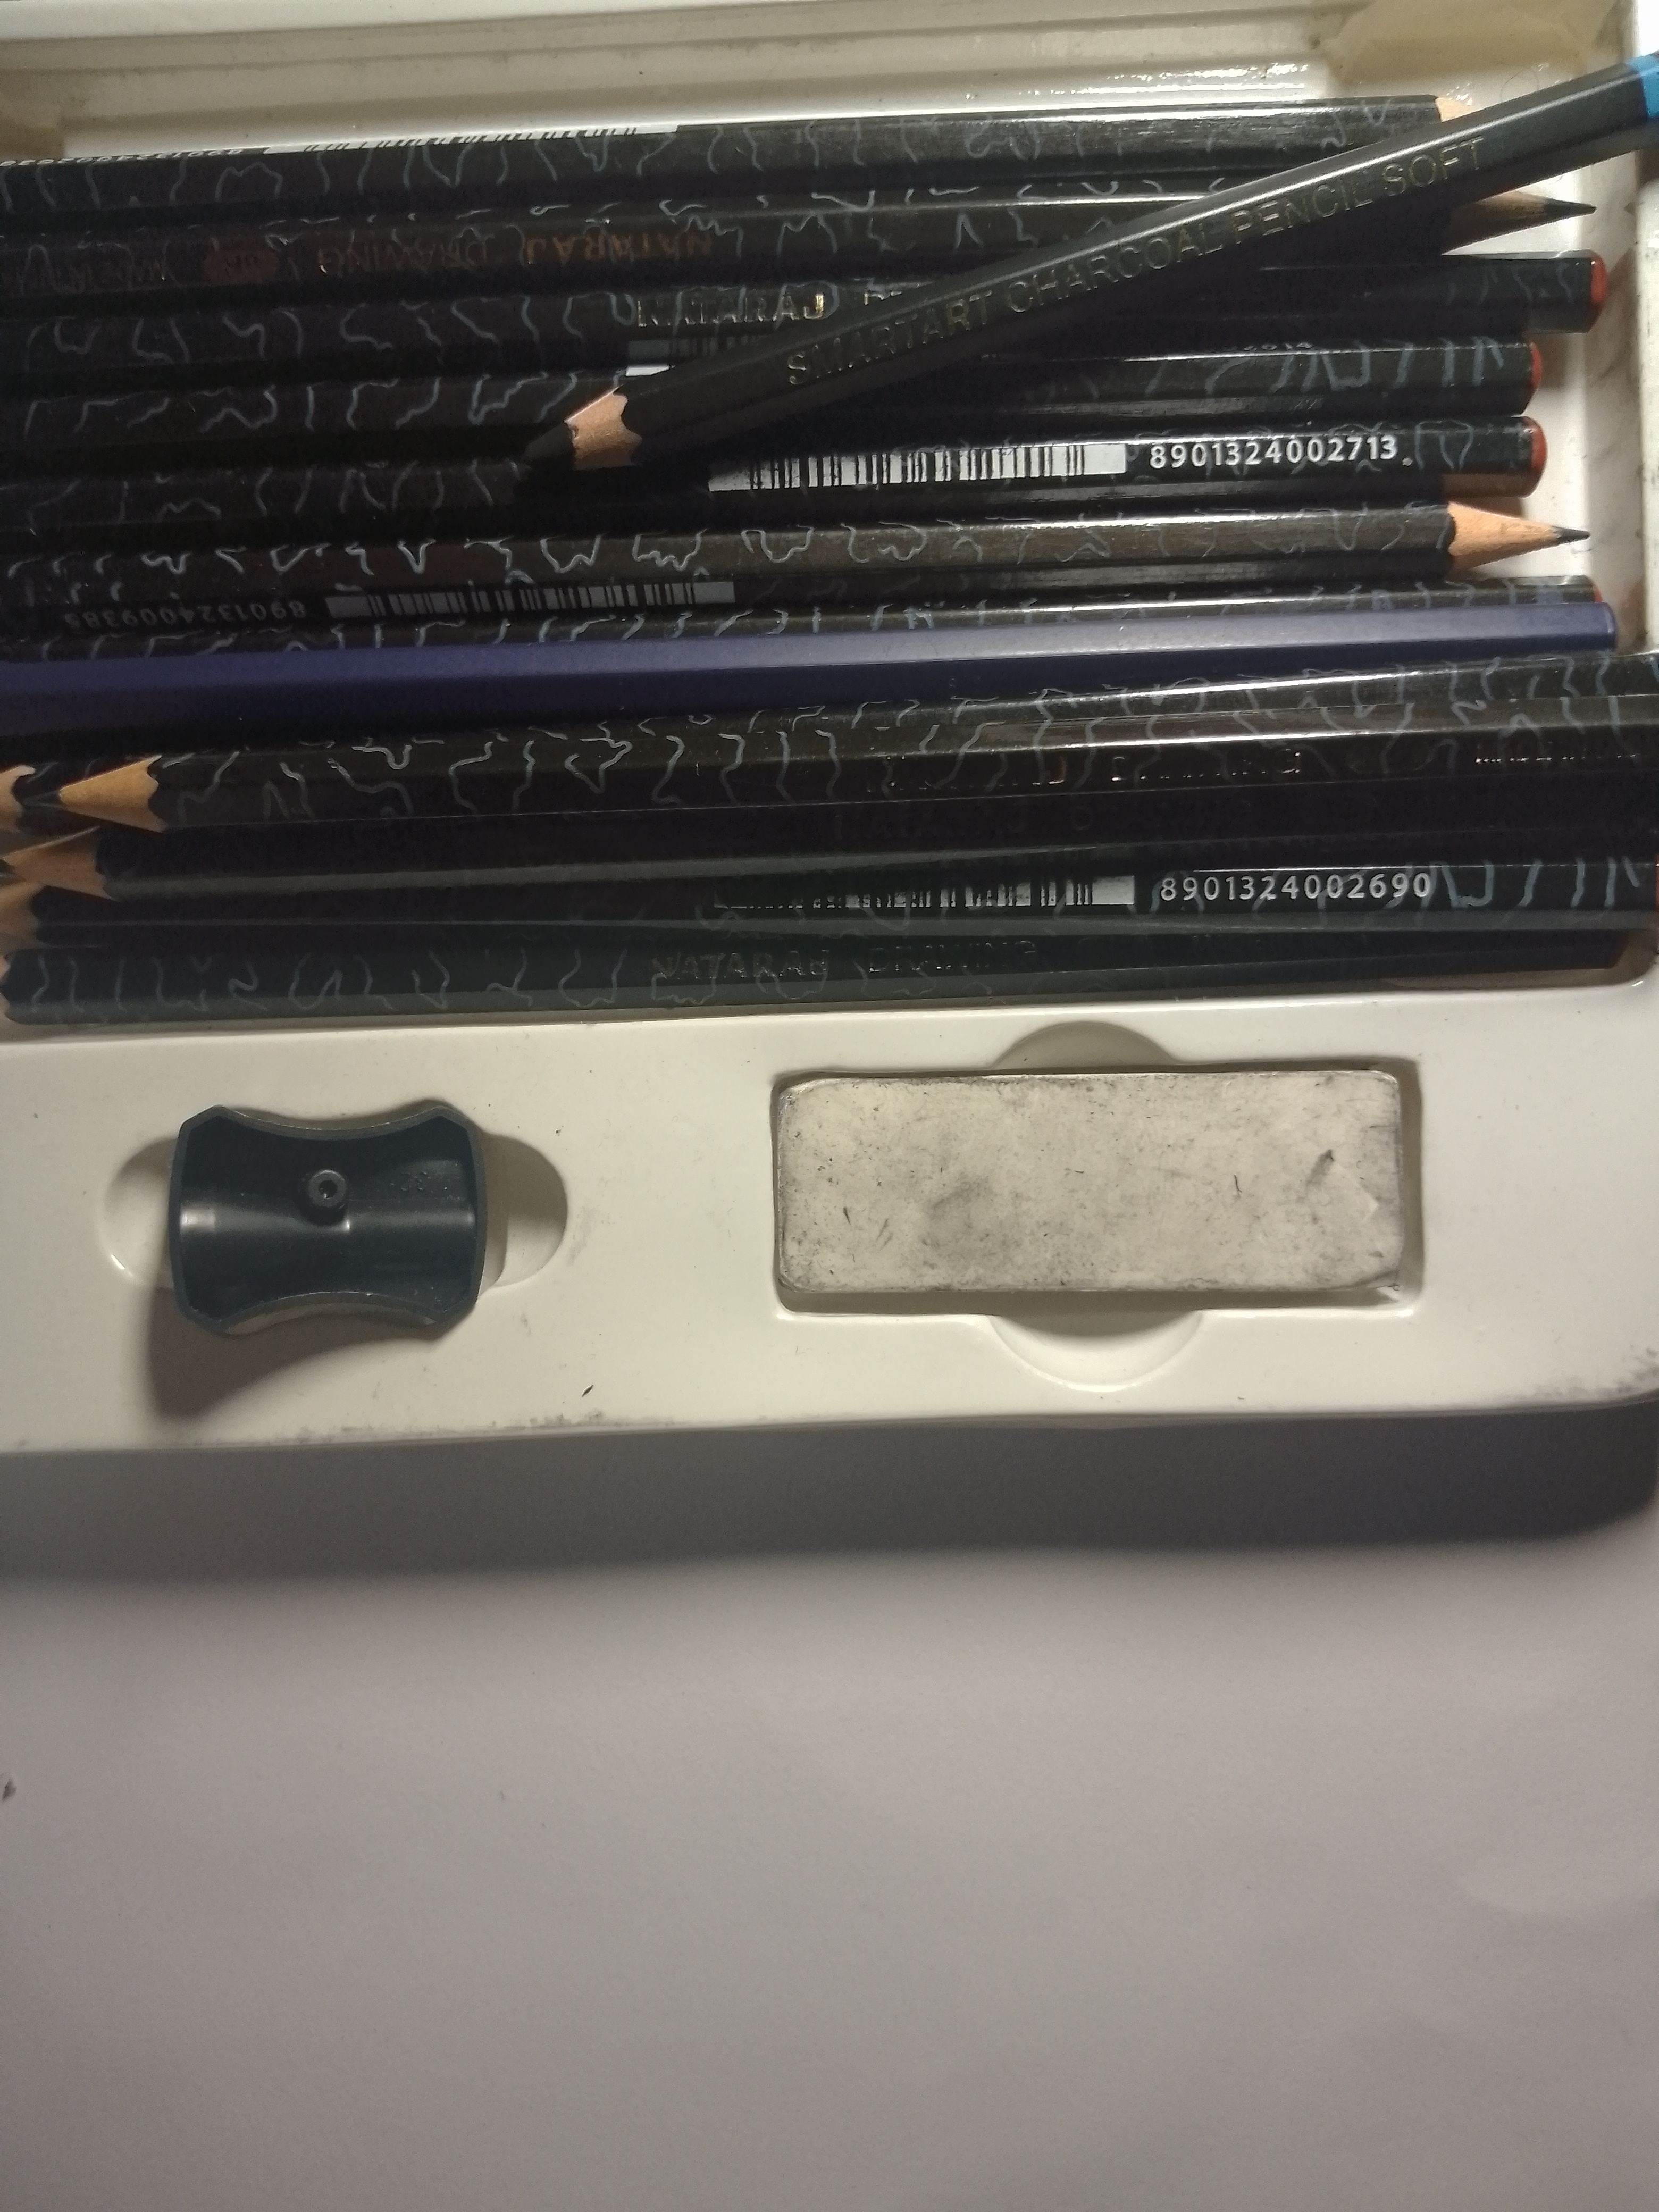
Materials needed
• A4 paper
• mechanical pencil
• graphite pencils
• 6B pencil
• charcoal pencil
• black pen
• blending tissue
• eraser
• sharpener
Step-by-Step Process
Step 1
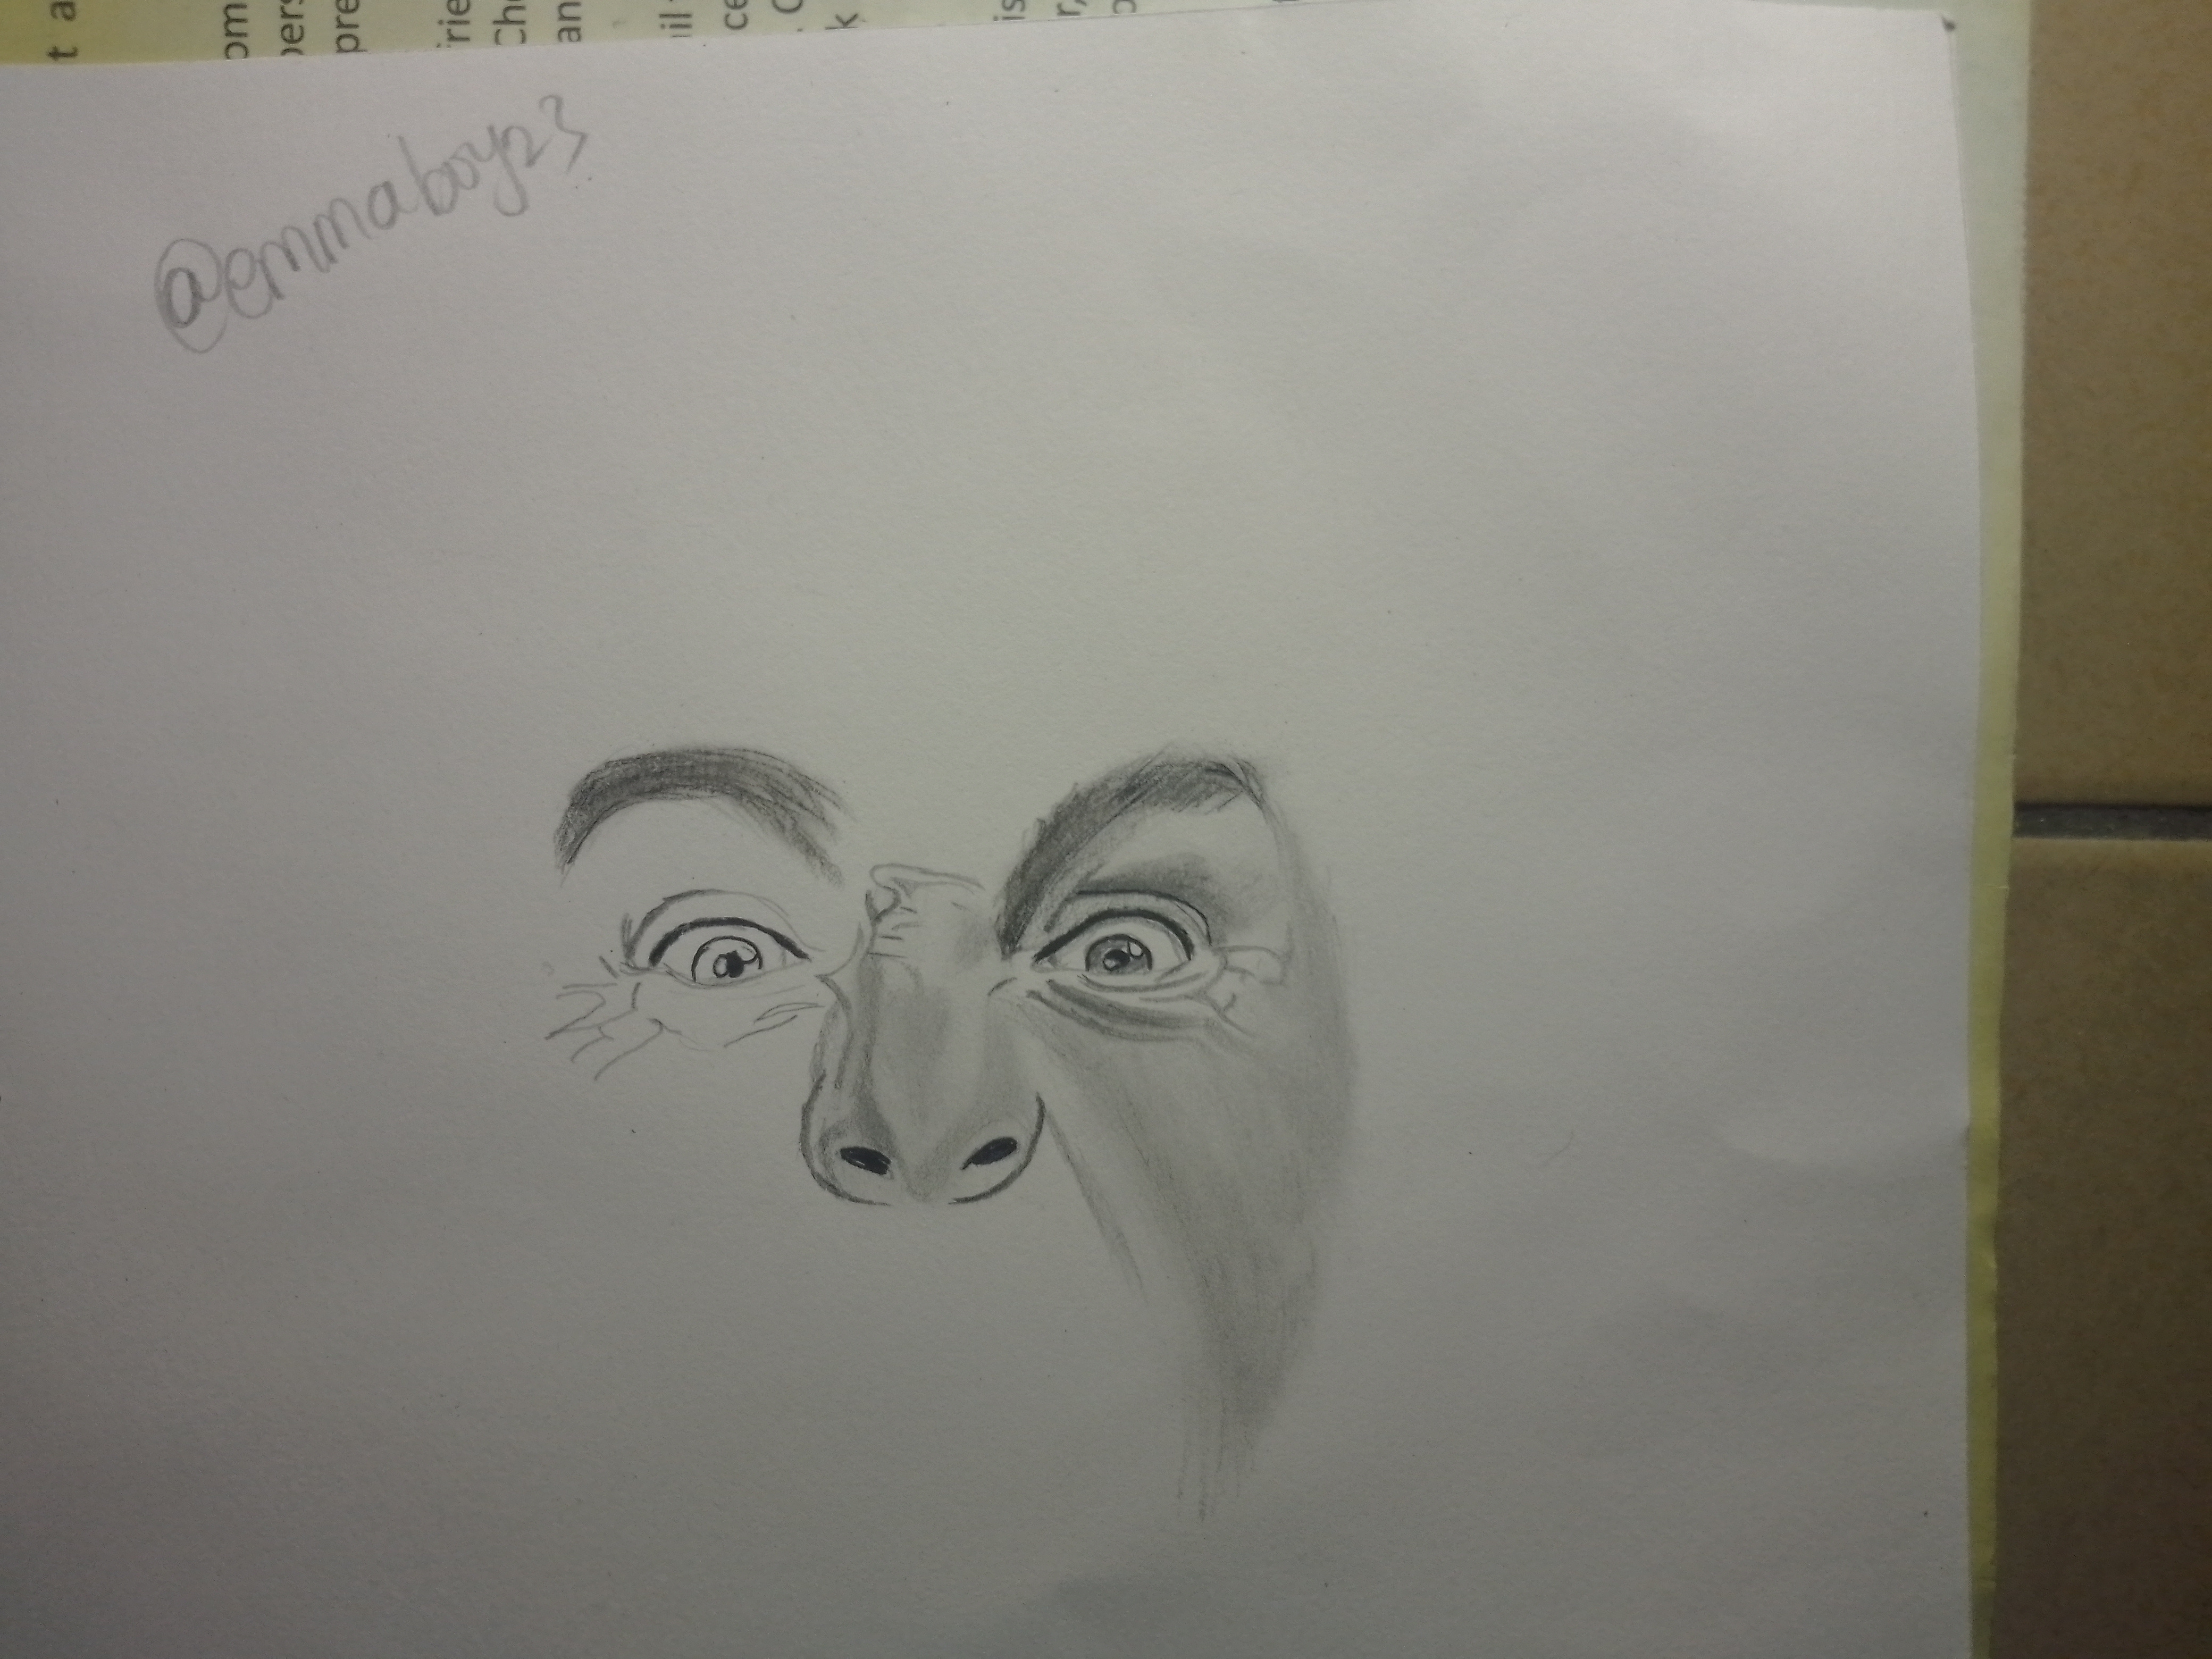
I always begin my drawing with the eyes, and so I carefully shaded around them to create depth. I darkened the upper eyelids and added wrinkles around the eyes to make the expression more intense, and I also added the nose as well.
Step 2
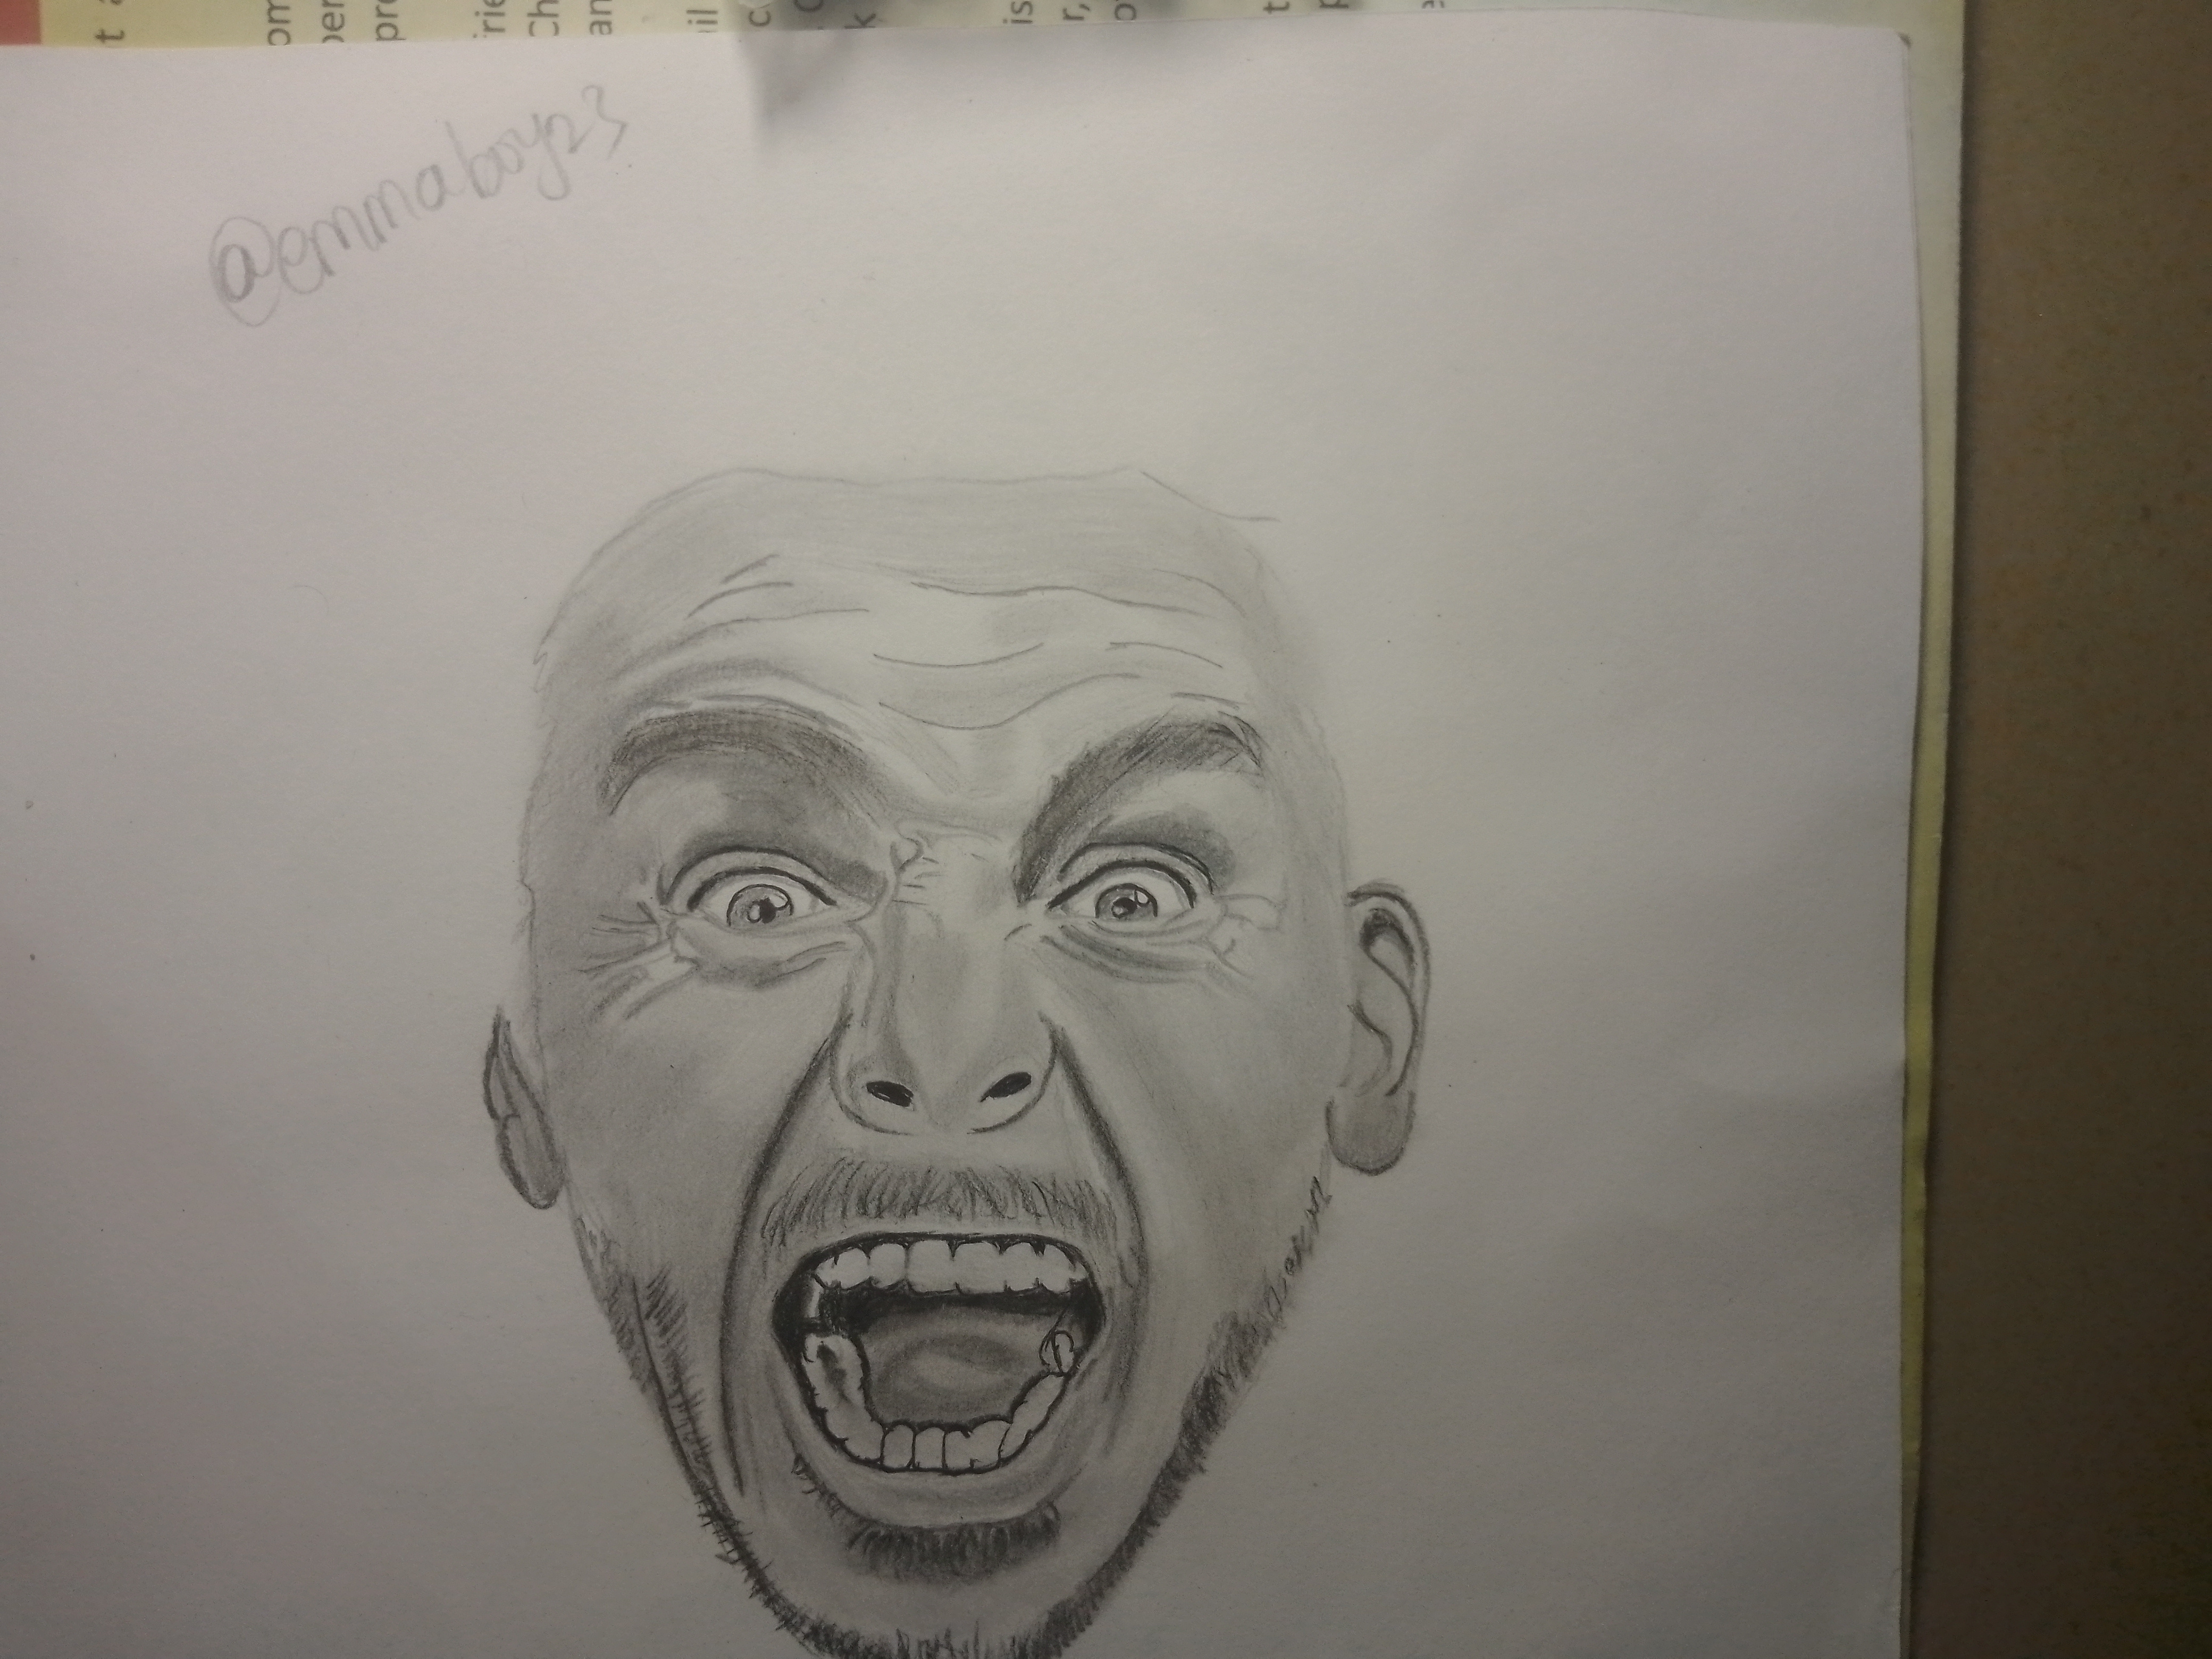
Next, I gradually shaded some part of the face, like the two cheeks, and then I focused on the mouth and lips. I first shaded the inside of the mouth very dark using a 6B pencil to create depth. After that, I carefully worked on the teeth by adding soft shadows around each tooth instead of leaving them completely white.

Step 3
Here I completed shading the face, and I also added darker tones around the lips and corners of the mouth to make the scream look stronger and more dramatic. Then after that I added the beard on the face.
Step 4
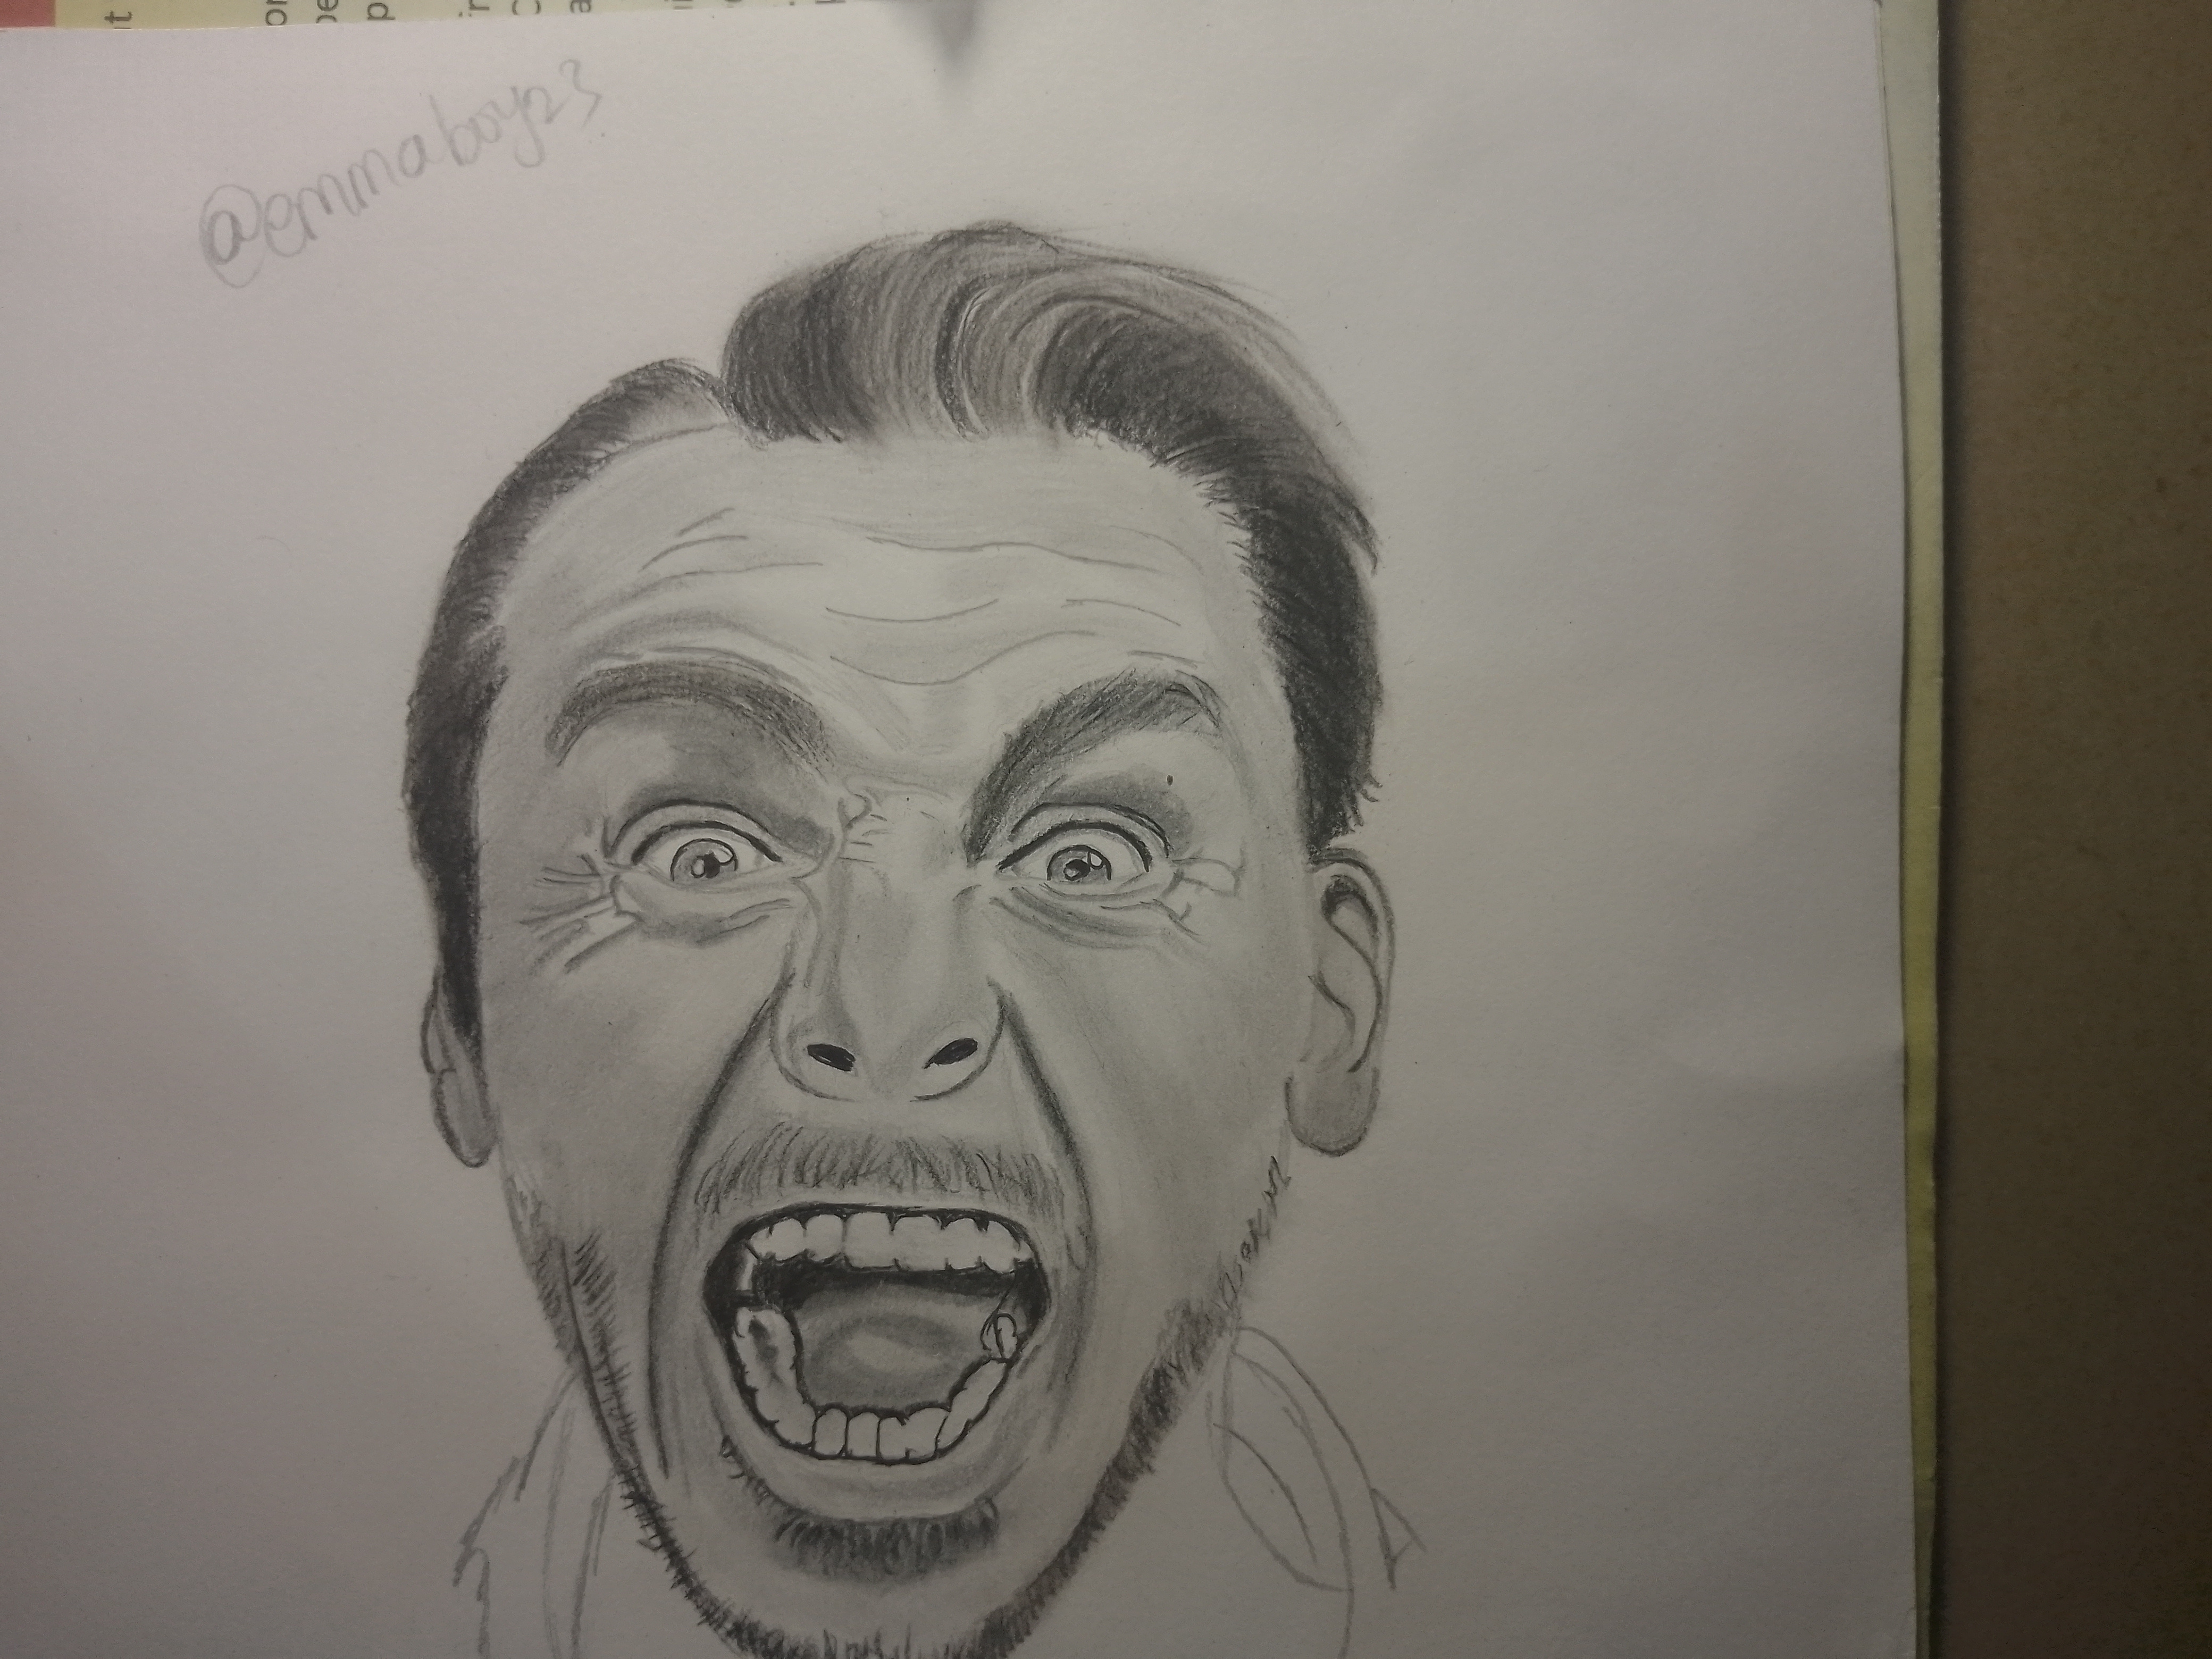
In this step, the hair was next. I used darker shading around the edges and lighter highlights in some areas to make the hair appear more natural.
Step 5
Here I completed the essential part of the portrait by adding the neck and a piece of clothing he was wearing using various shading techniques.
Step 6
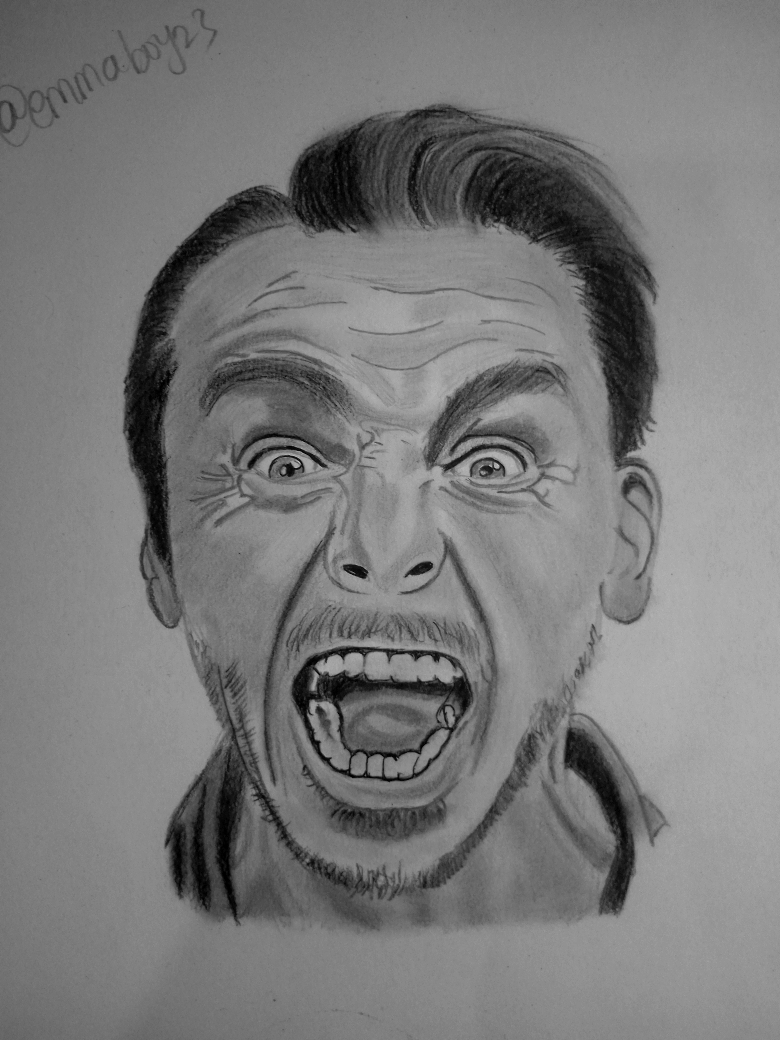
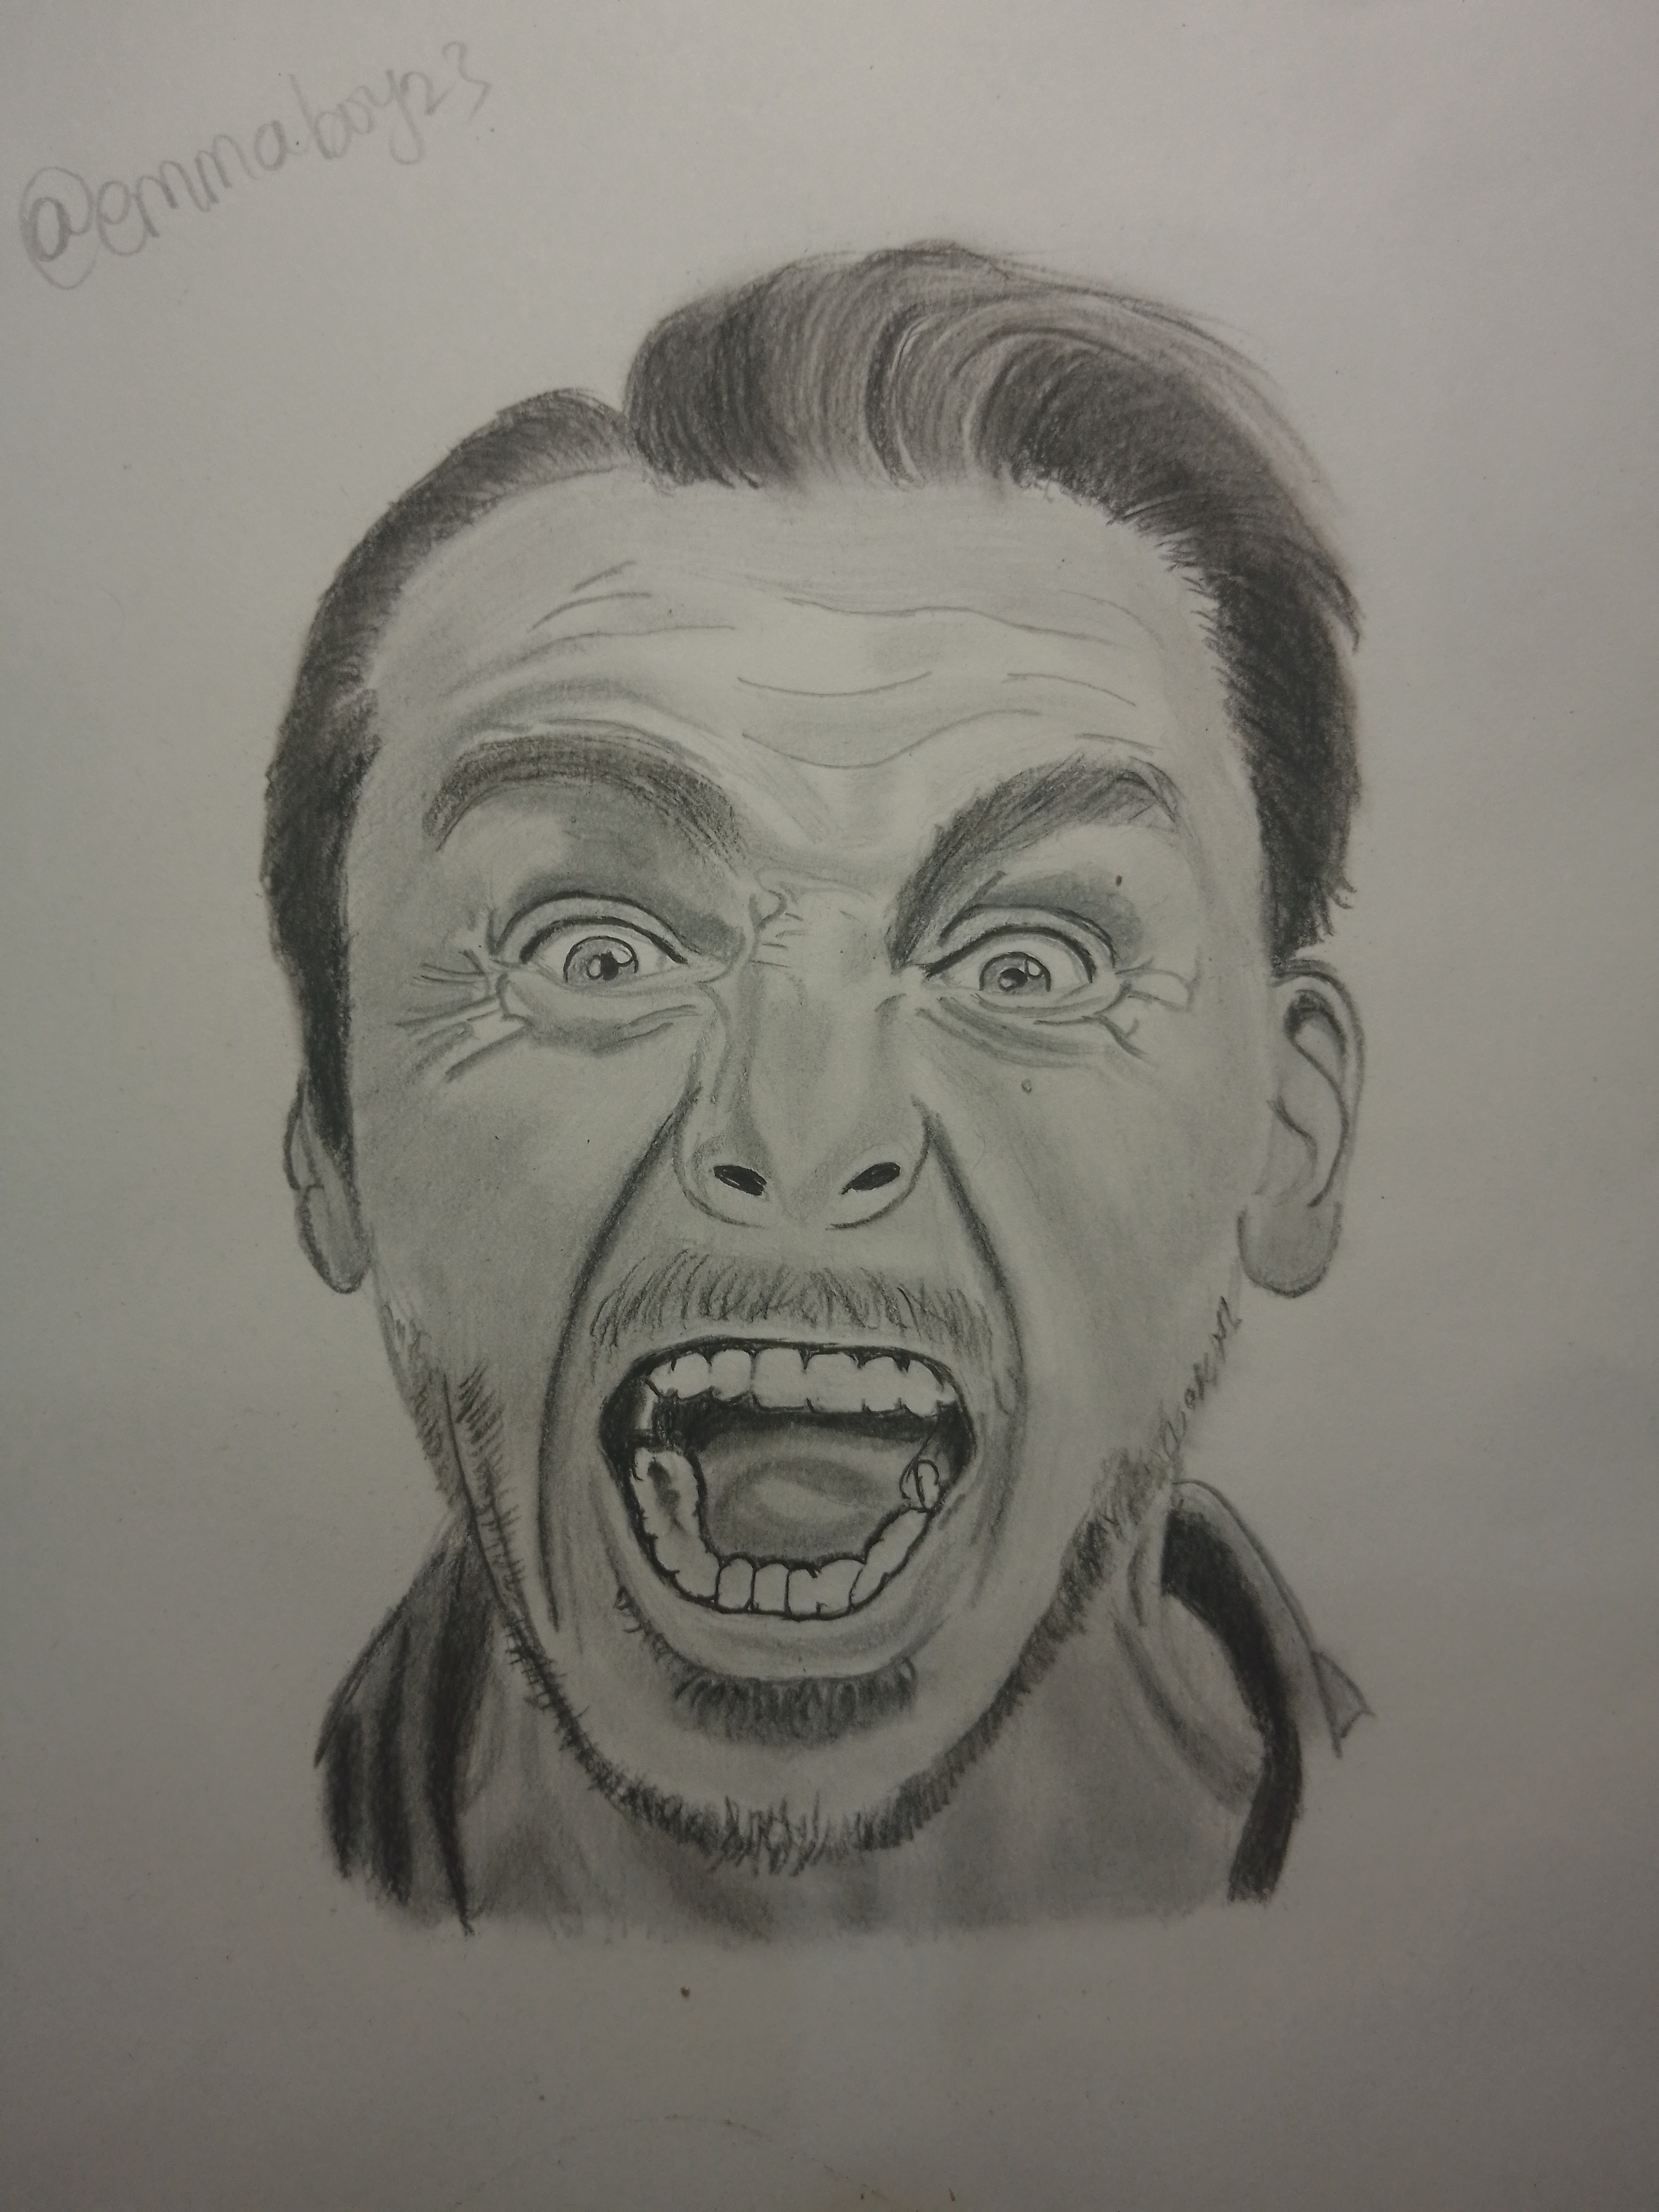
At the final stage, I went back to strengthen some dark areas and smooth out rough shading. I refined the facial wrinkles, deepened the shadows around the mouth, and cleaned some highlighted areas with my eraser. This final adjustment helped the portrait become more bold and clear; below is my final result.
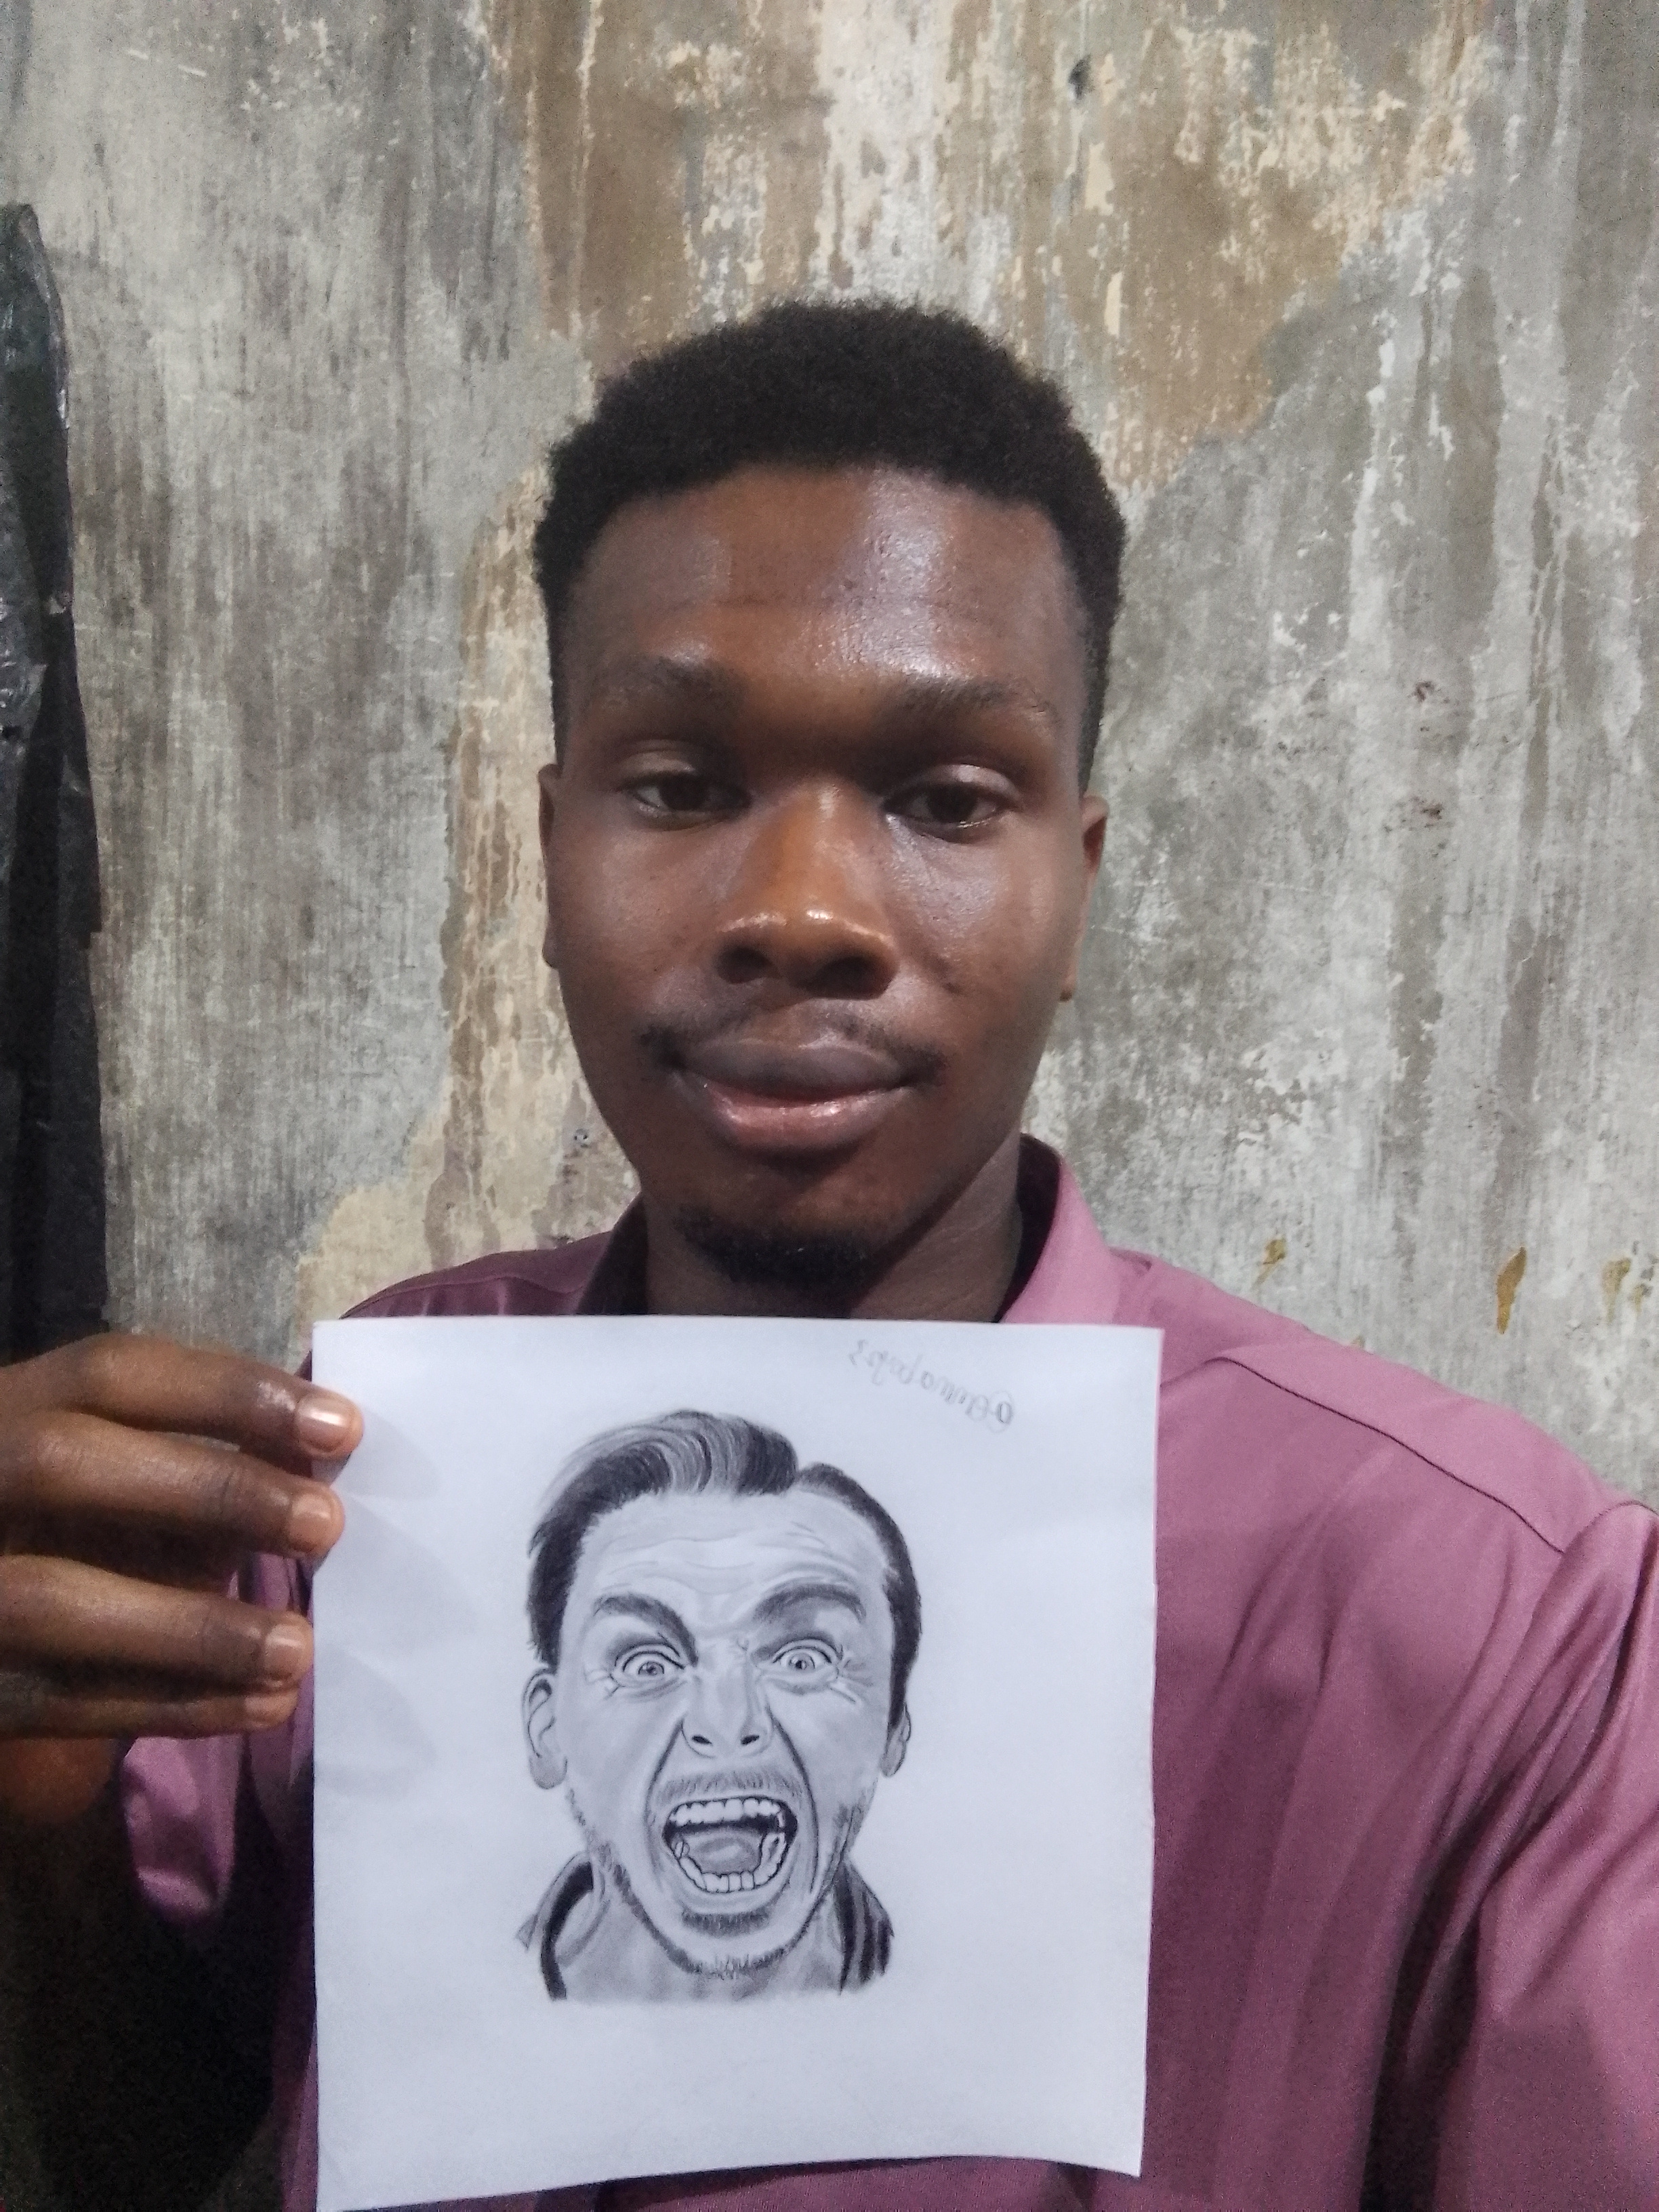
My selfie with my drawing
Creating expressive faces is always challenging because every line and shadow contributes to the feeling of the artwork. Art is not always about drawing perfect beauty. Sometimes, the strongest artworks are the ones that express raw human emotion and energy. Thank you all for visiting my blog and supporting my artistic journey, and I would also love to thank @mesola for this amazing contest to enable me to express my creativity. See you all in my next post.
Inviting
THANKS FOR YOUR TIME
Posted with Speem
Your post have been rewarded by the Speak on Steem curator team!
Now become a plus member delegating at least 500 SP
Ways to support us:
Curated by @marvinvelasquez
My Twitter promotion link
https://twitter.com/emmaboy23/status/2054416845617221672?t=HH_8KOz45SNTIWscM3xOMQ&s=19
Keep soaring higher boss