CharaStudio lighting and shaders
A starting point to learn about lighting and shaders
One important thing to note, you cannot do in the main game mode what can be achieved in Studio in terms of lighting, and I will be focusing on Studio
- Requirements -
(Most of the following components should be in the 3.35 HF patch, and the rest you can get from GitHub or the #koikatsu-mod-release-forum on Discord. Use KKManager's plugins and mods tab to check what it is you have already)
Here are the minimum components you need:
(Refer to this folder map if you don't know where things go)
[Plugins]
- LightSettings
- Material Editor 3.13+
- ObjectMap to access lights of maps (use v1.1.x, or 1.2+ once a stable build is released)
- Shader Fixer (KK Sunshine only)
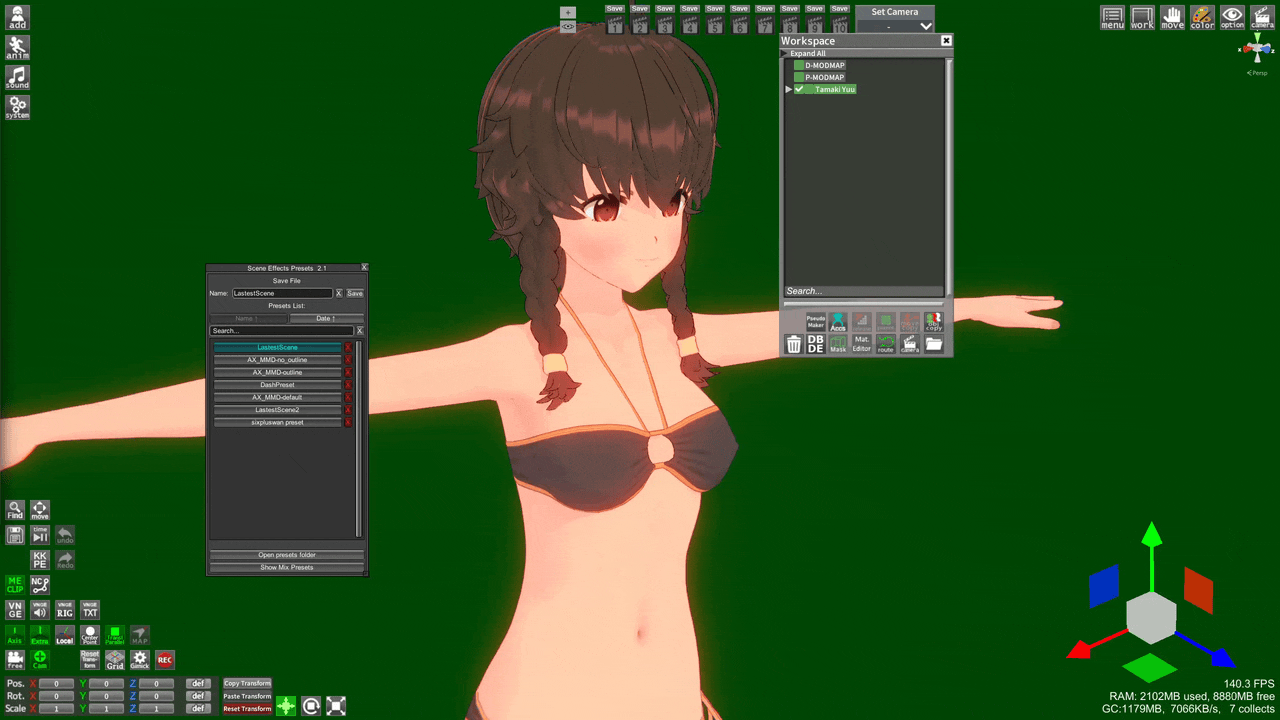
- (optional) SceneEffectsPresets (Alt+F)
- (optional) BetterShadowQualitySettings
[Patchers]
- KKShadowPatcher (only KK/Party needs it)
[Shader mods (pick 1 or more)]
- xukmi VanillaPlus shader version 1.7+
- KKUTS shader (or KKSUTS for Sunshine, do not keep more than one)
- Az shader
- Basics -
If you are new to CharaStudio, start with the basics:
- Playlist of basics (Youtube)
- Intro to CharaStudio (Youtube)
- Navigating the Studio interface (Discord PDF)
If you are already familiar with CharaStudio, then Basic scene lighting and Scene effects menu will be related to lighting
- Lighting -
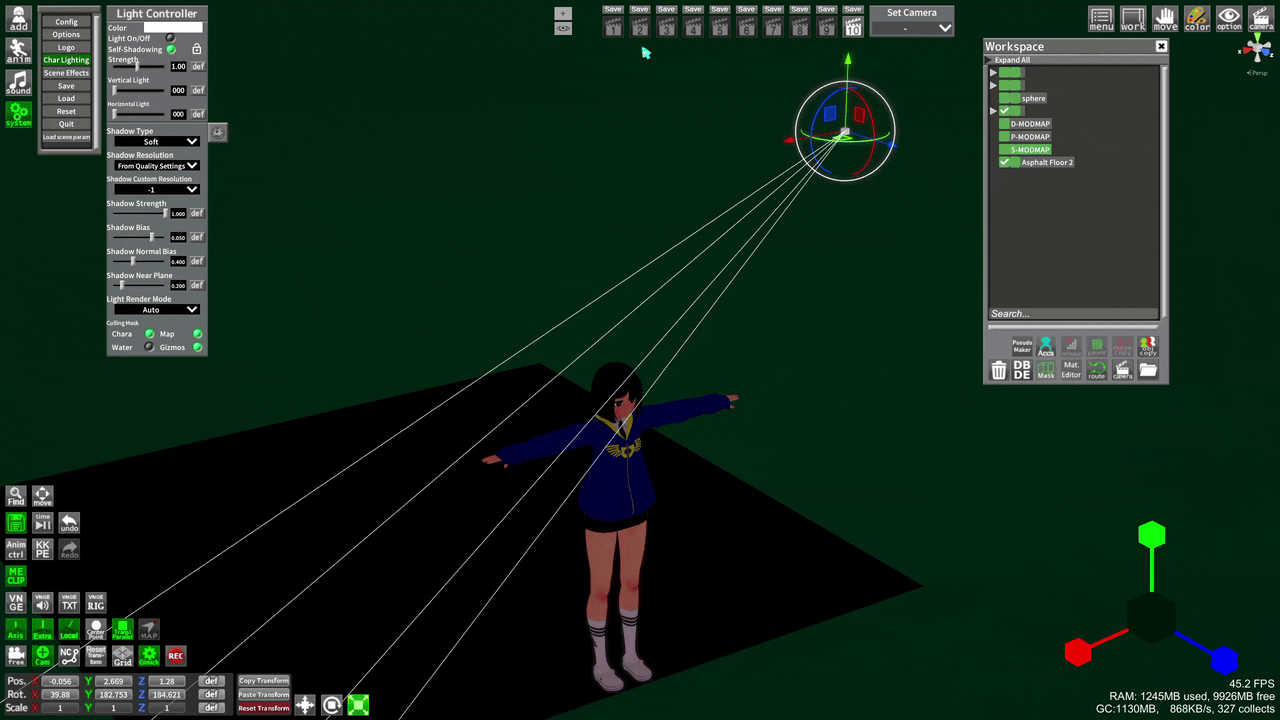
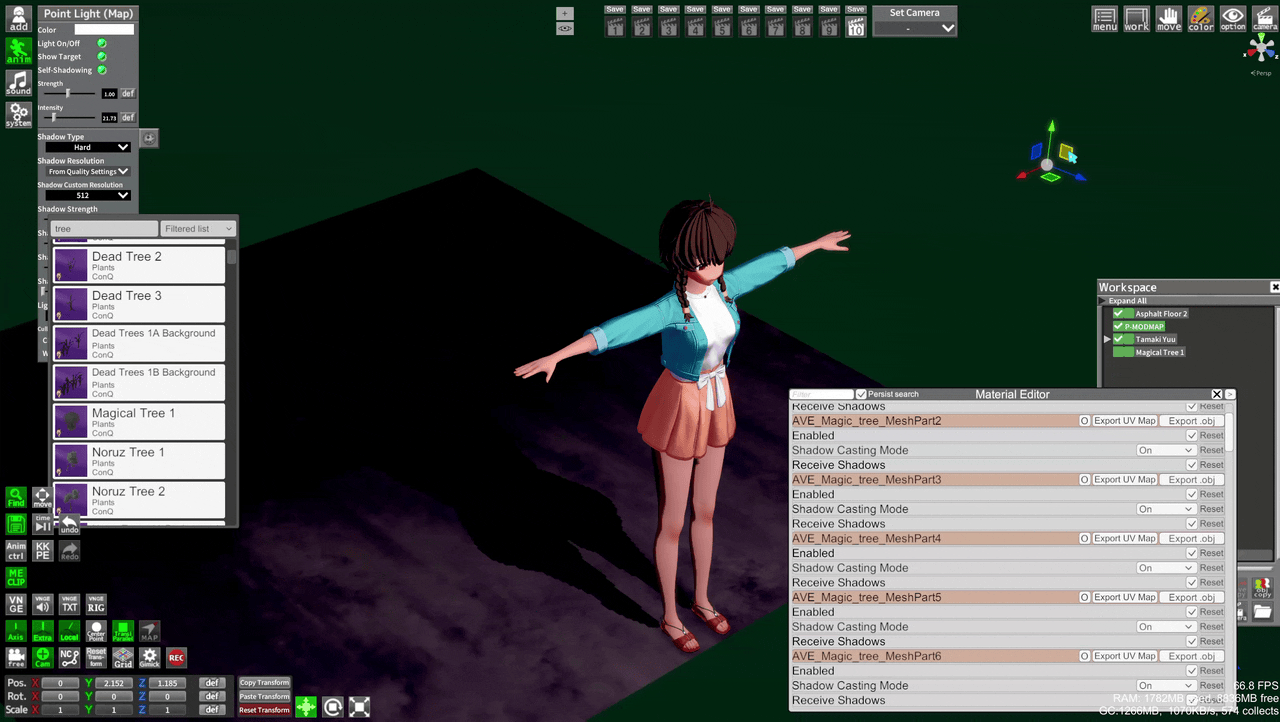
Types of lights
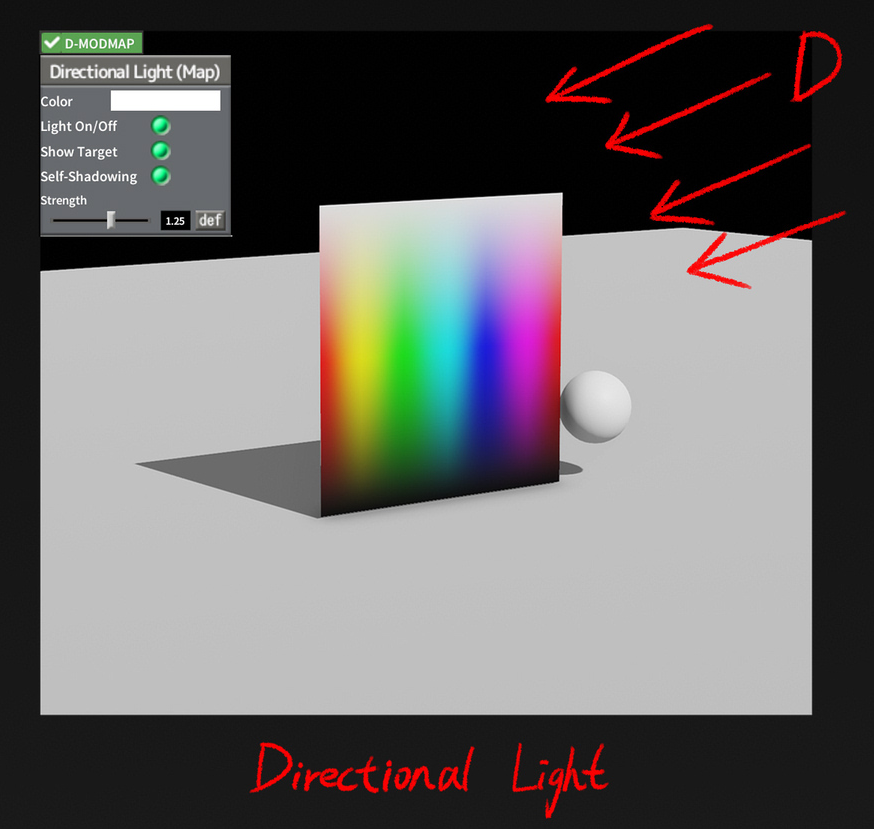
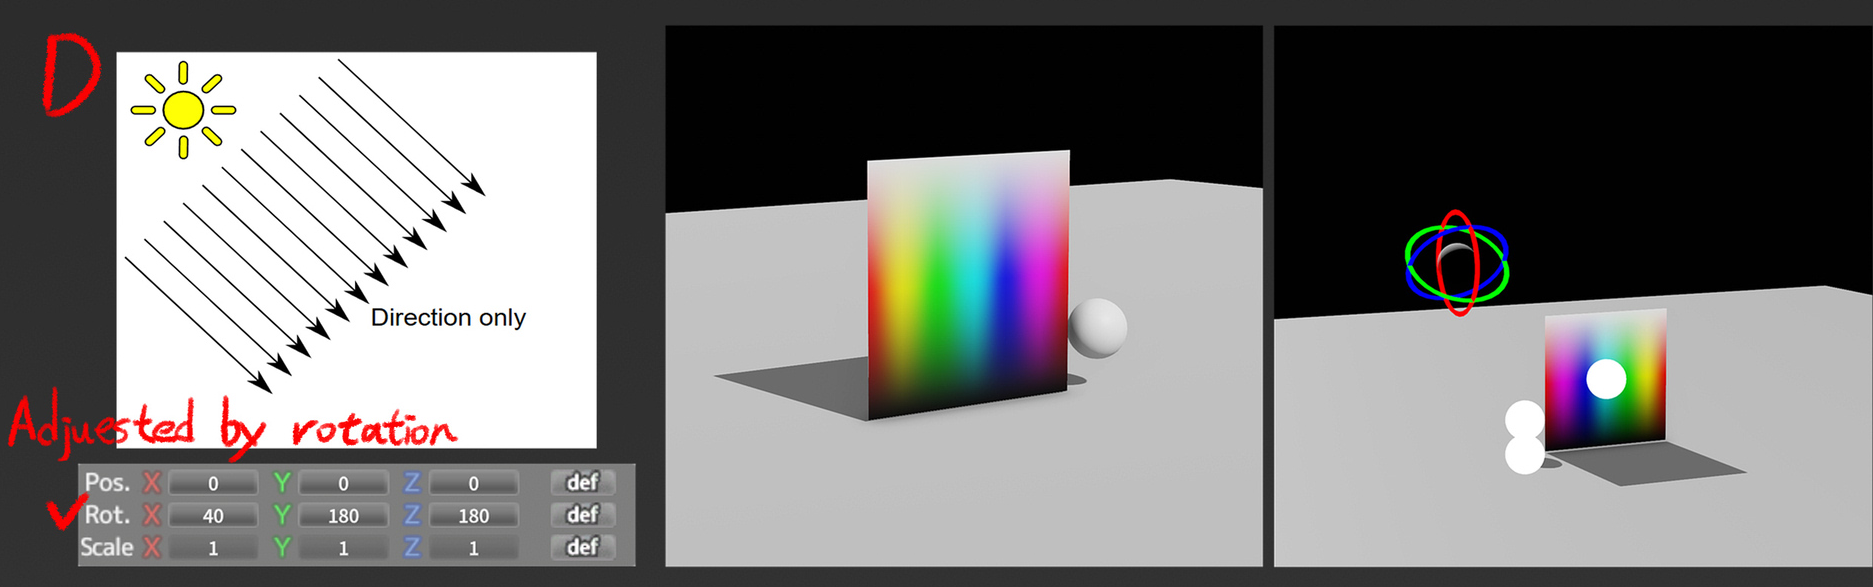
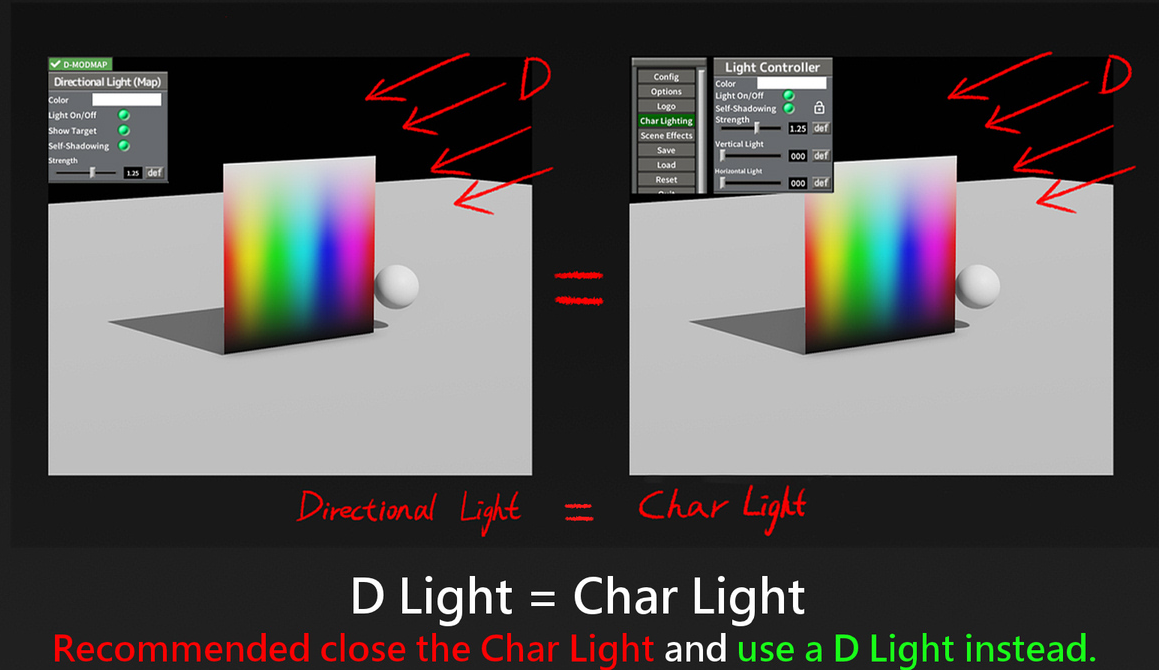
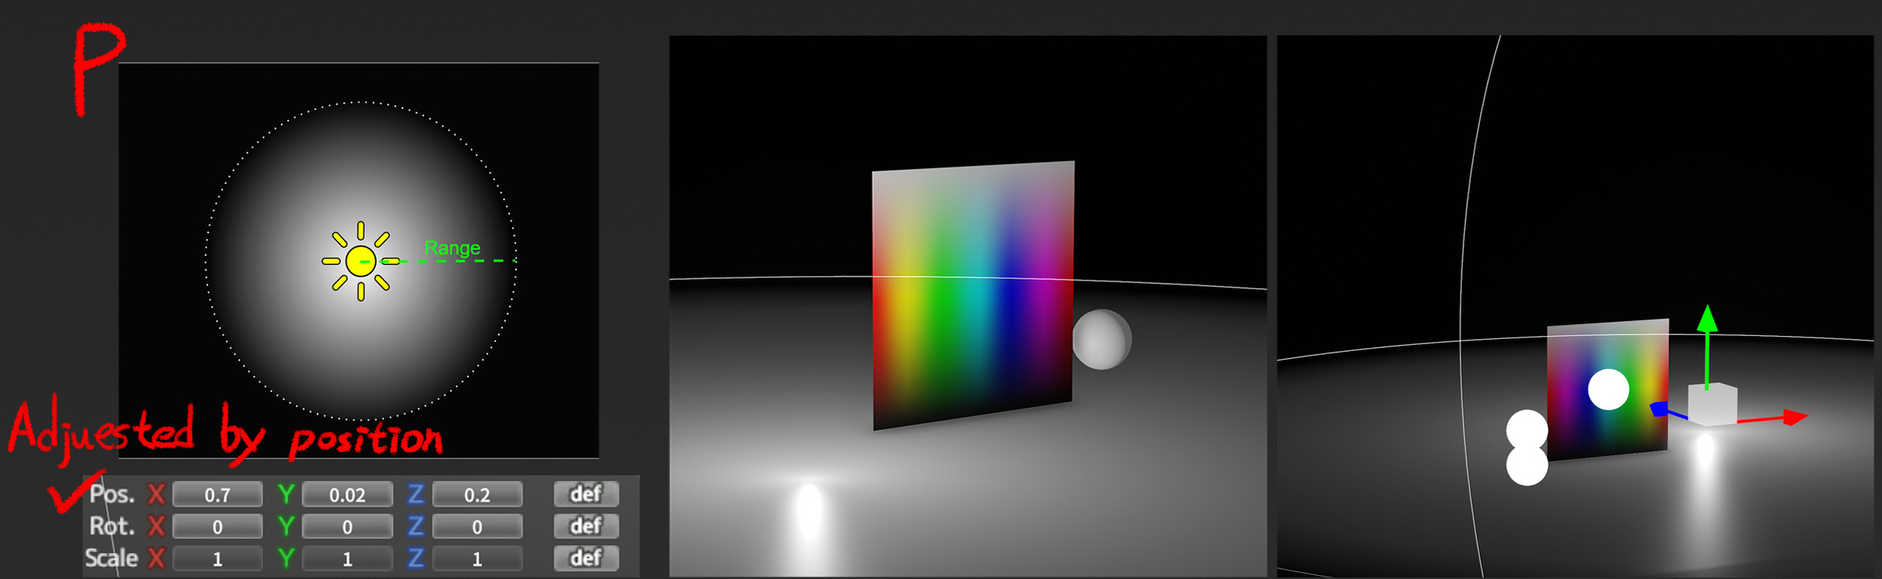
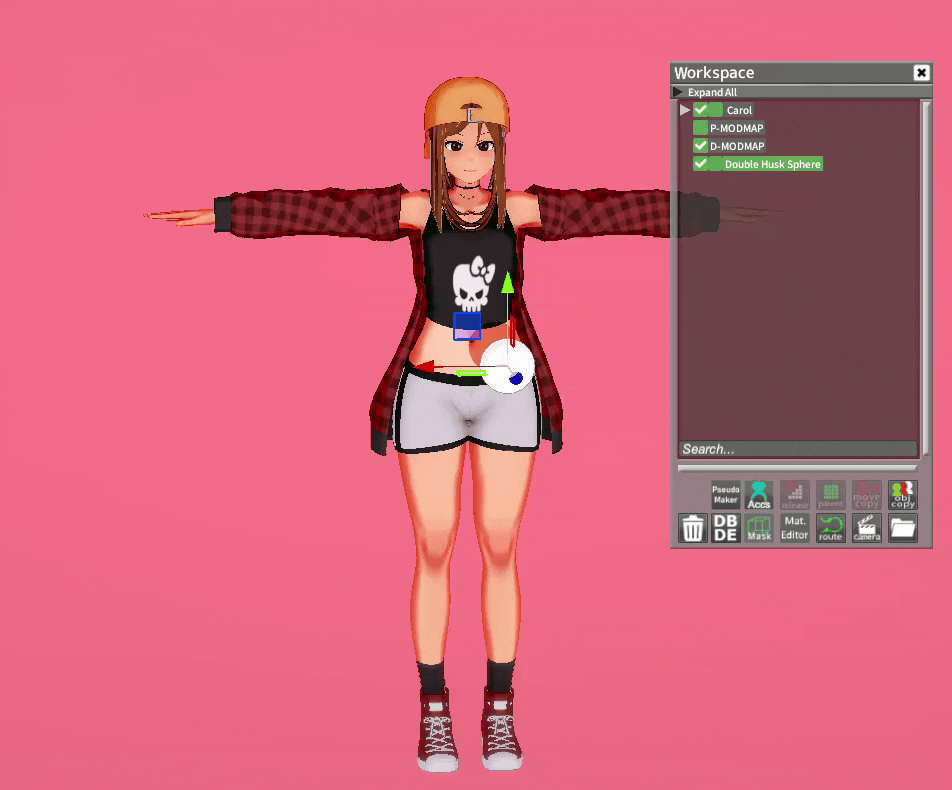
D-MODMAP
Think of it like the Sun, it always shines from a distance. Same type of light as System->Character Lighting, often used in maps
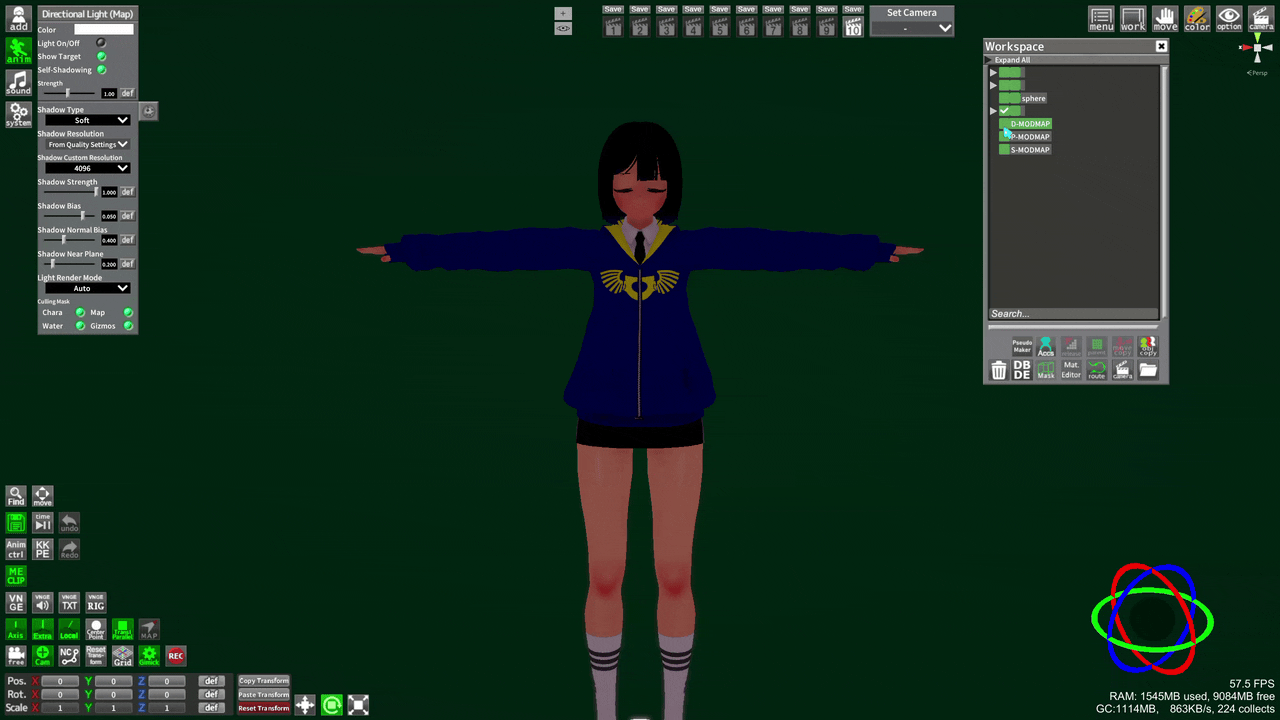
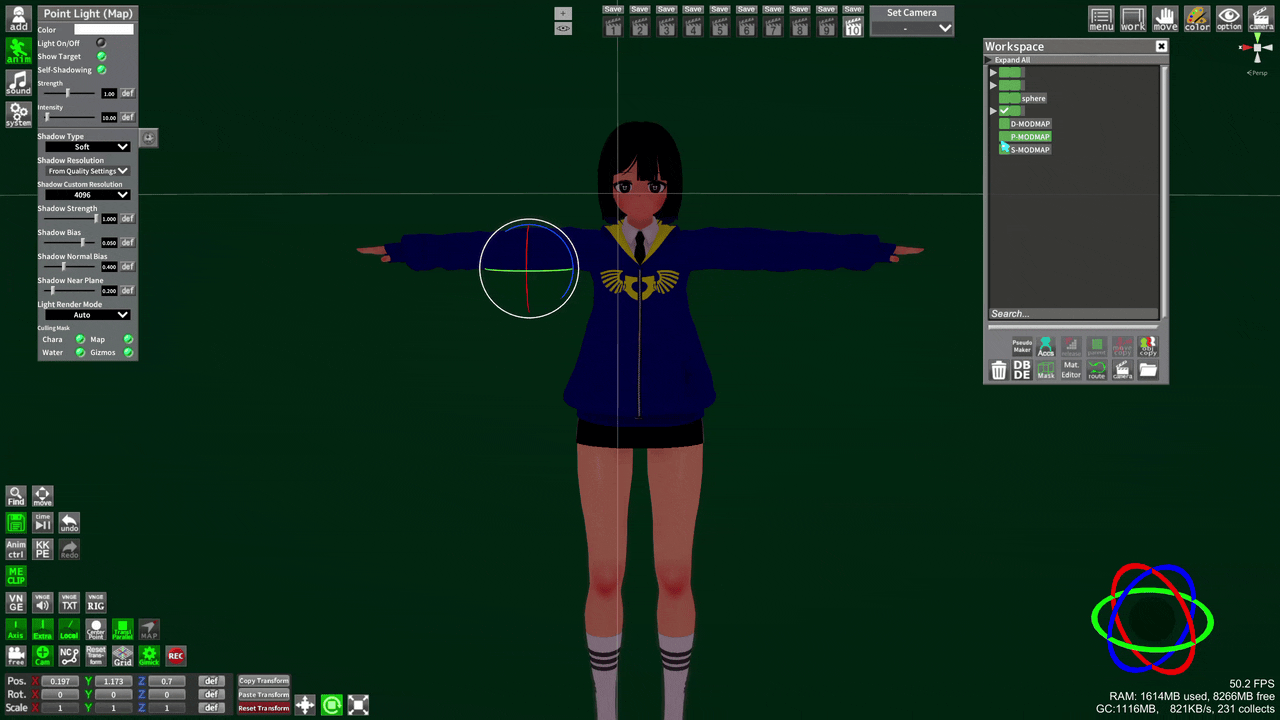
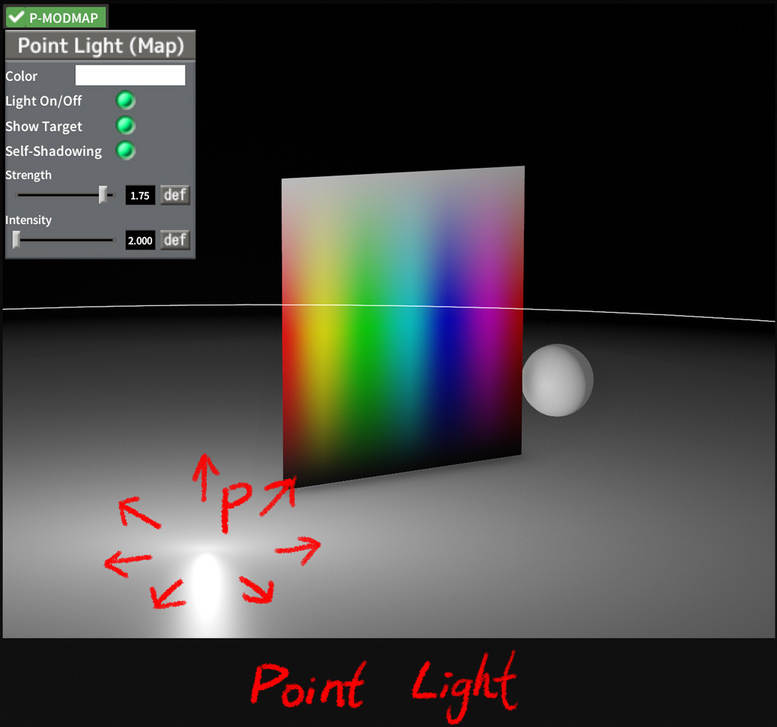
P-MODMAP
A "point" light, useful to highlight specific aspects of your character or to simulate lighting elements of your scene (ex. a candle's light)
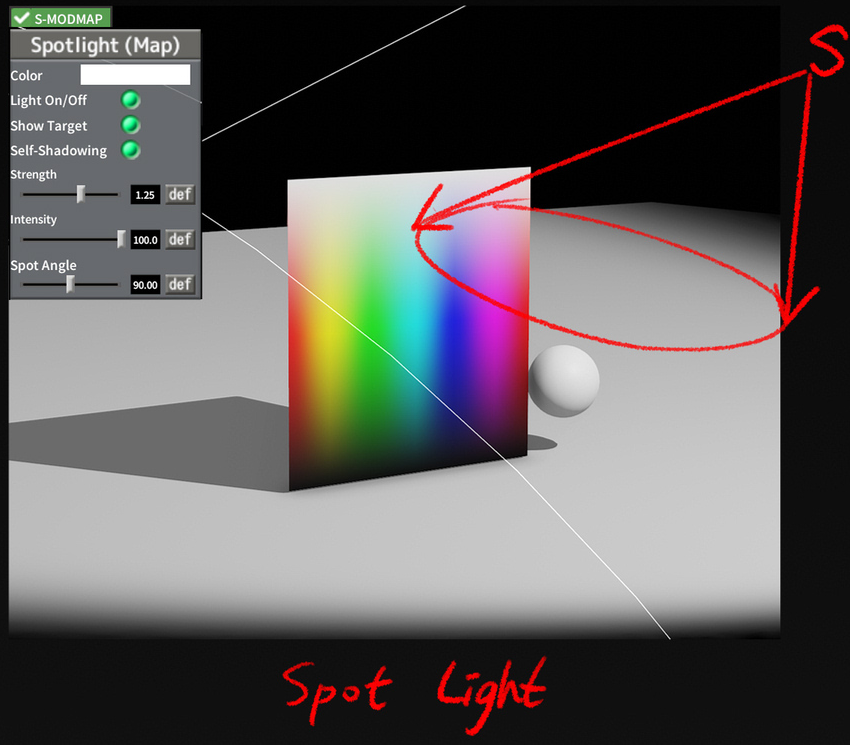
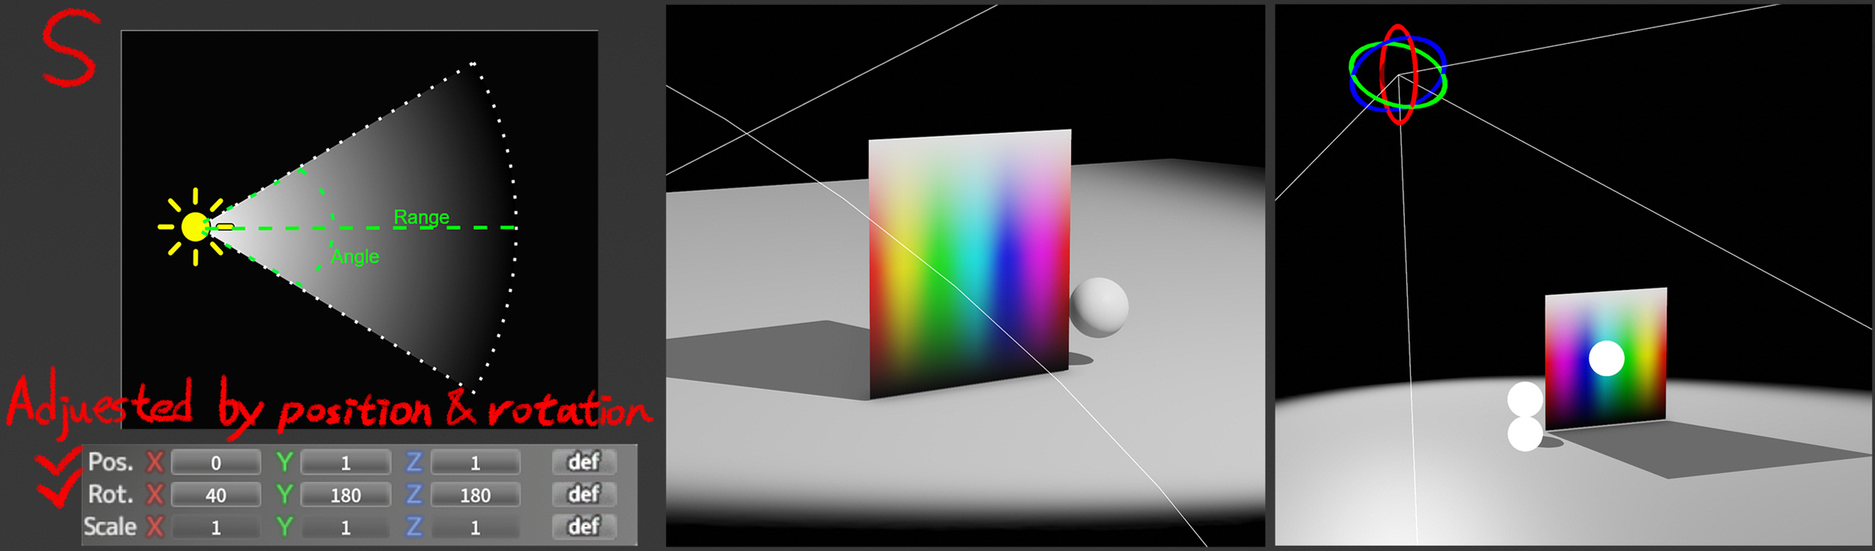
S-MODMAP
A spotlight, useful for a more directed light (ex. a spotlight or flashlight item)
Light from map
Maps from add->Map often have their own lighting. The ObjectMap plugin makes it possible to access elements of the map and edit the lighting
Light Layers
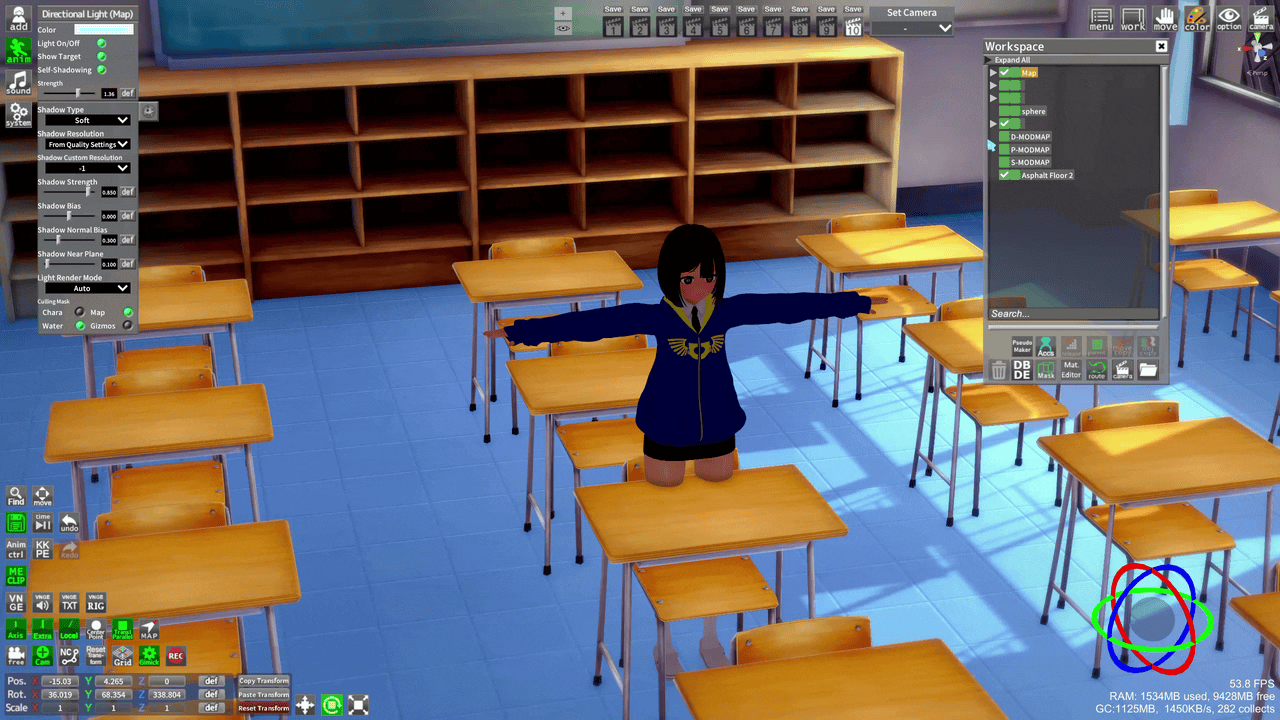
Lights can be set up to affect different layers. This allows you to have lights that affect only certain elements of your scenes. For example, lights that affect the environment and lights that affect the character. Both are affected by default.
There are 2 usable layers: Chara and Map
You can change the layer of anything by pressing V, except for characters (limited to the Chara layer)
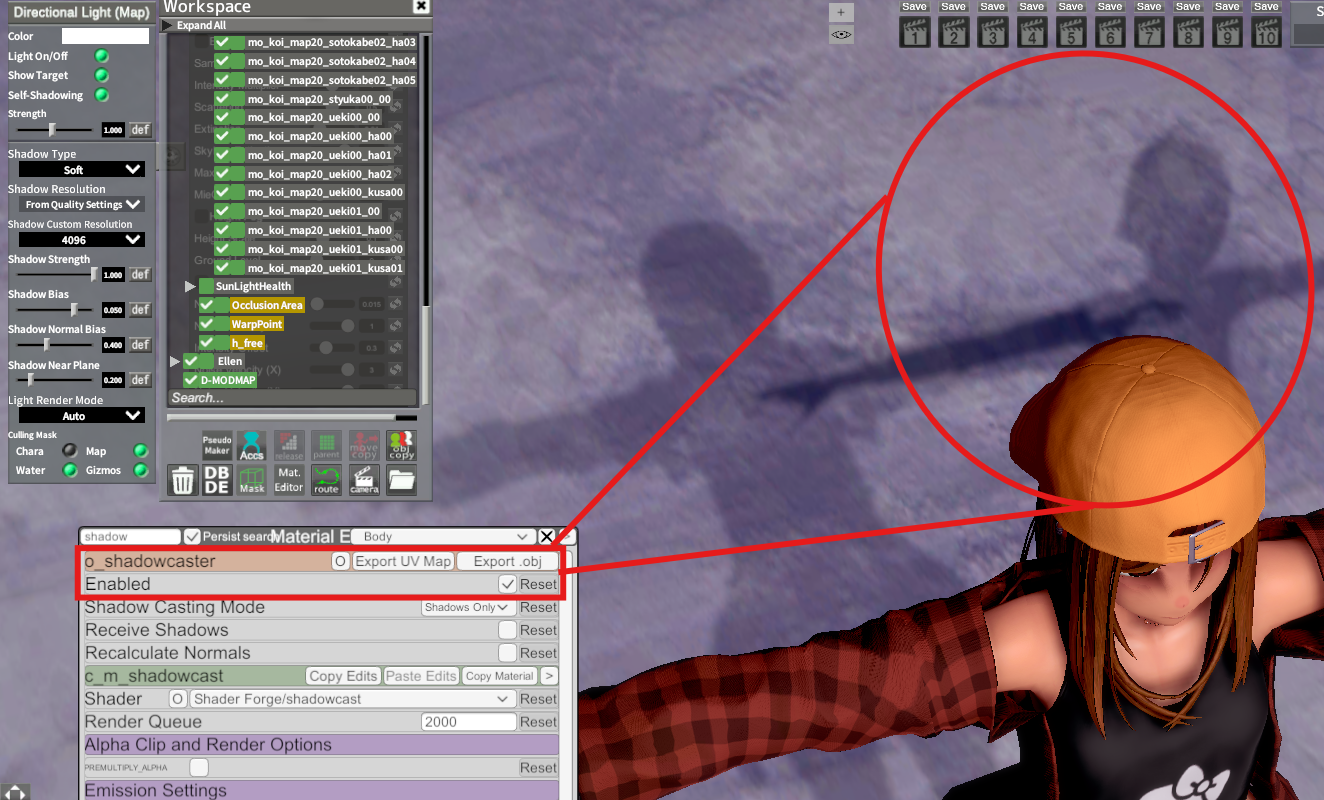
An important thing to note is that while characters are always on the Chara layer, they have a shadowcaster component that casts a hairless shadow on the Map layer. You probably won't notice it with a simple light setup where both Chara and Map toggles are enabled, but in a more complex setup where you might have some lights that only affect the Map layer you may went to disable the shadow caster in Material Editor.
Light and Shadow reception
Whether or not a surface will receive a shadow depends on the surface, the surface's shader, and the item casting the shadow. Same for how they receive the light, so test different lights and different shaders.
Also, some objects are set not to cast shadows by default, so enable them if you need
The distance of your lights, your shadow resolution, and shadow parameters can all affect how good the shadow looks, especially for "true lighting" shaders like KKUTS
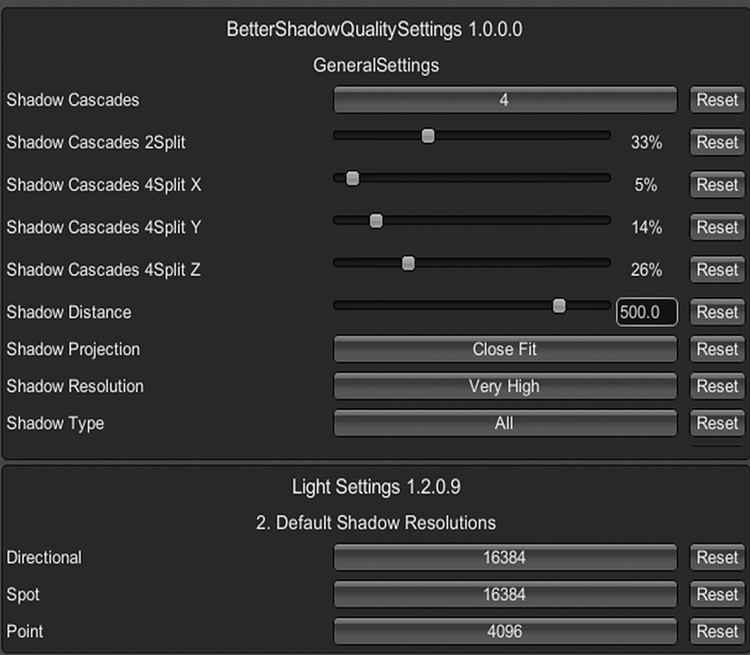
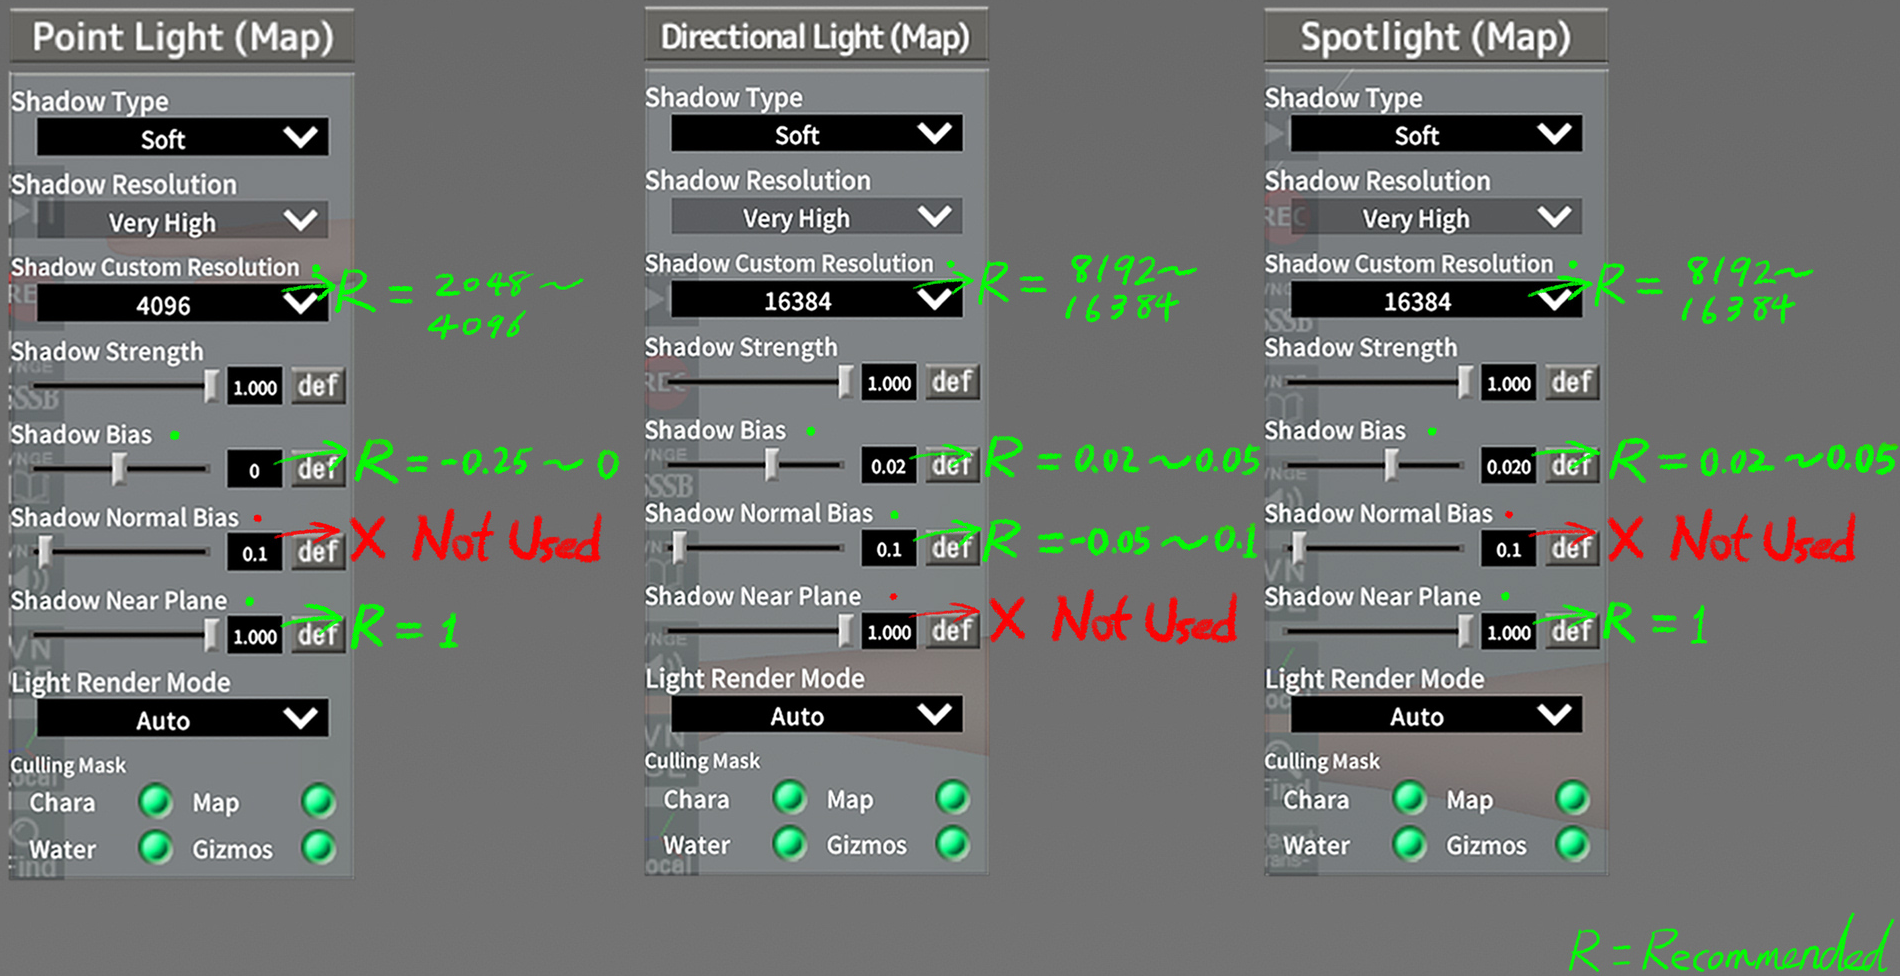
- Shadows -
Original author: Discord@UTerli
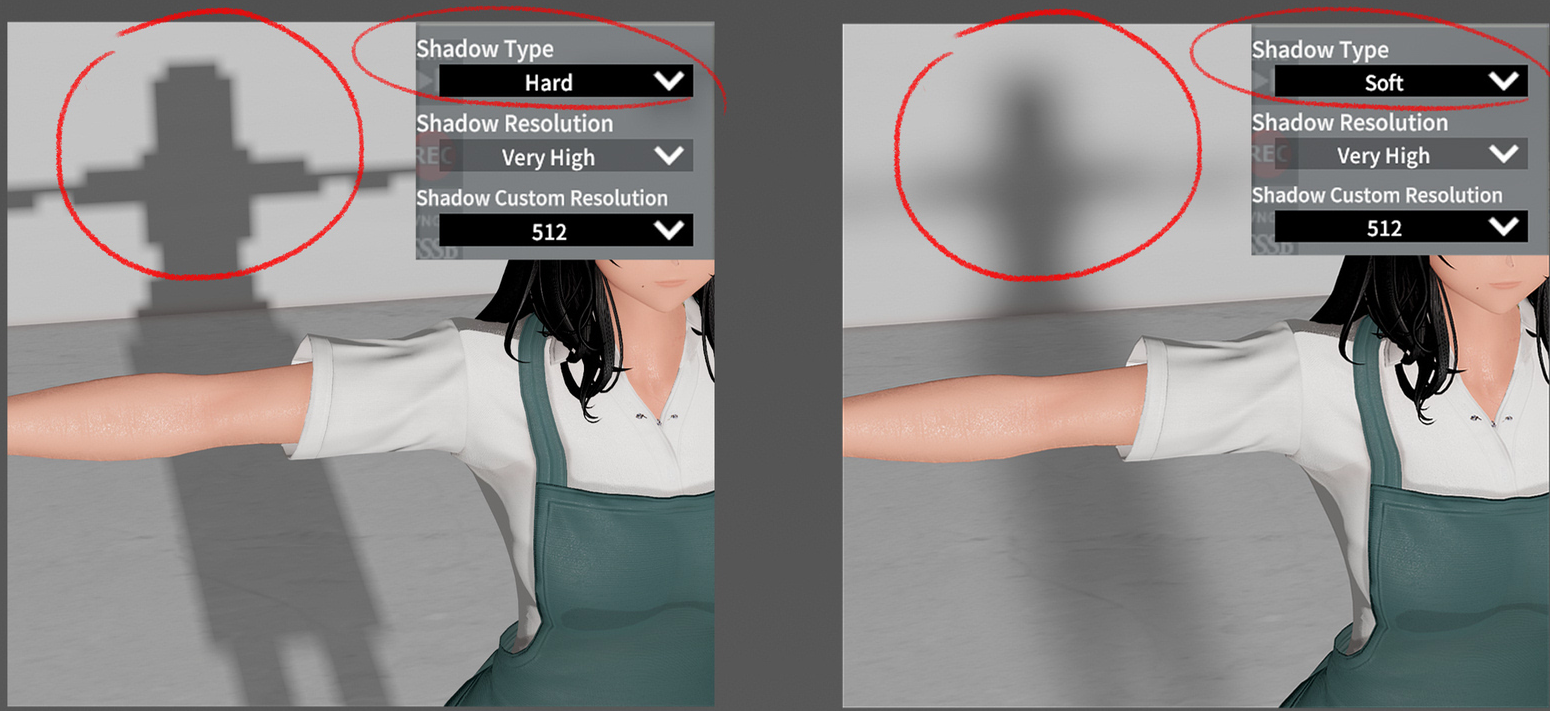
Shadow Type
Determine whether this Light casts Hard Shadows, Soft Shadows, or no shadows at all. Hard Shadows produces shadows with a sharp edge. Hard shadows aren't realistic compared to Soft Shadows but they involve less processing, and are acceptable for many purposes. Soft shadows also tend to reduce the "blocky" aliasing effect from the shadow map.
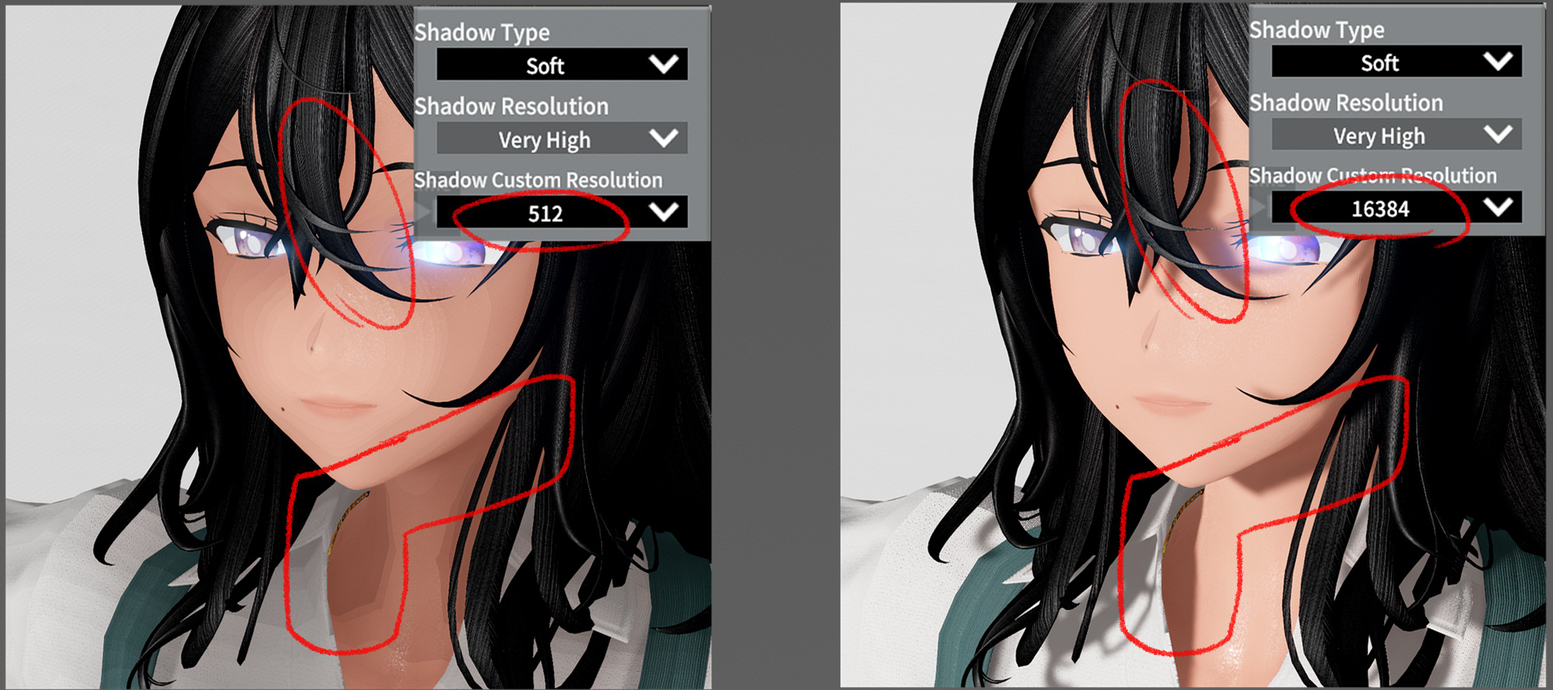
Shadow Resolution
Control the rendered resolution of shadow maps. A higher resolution increases the fidelity of shadows, but requires more GPU time and memory usage.
To reduce the "blockiness" of shadows, increase Shadow Resolution and/or bring the light source closer
Shadow Strength
Use the slider to control how dark the shadows cast by this Light are, represented by a value between 0 and 1. This is set to 1 by default.
Shadow Bias
Use the slider to control the distance at which shadows are pushed away from the light, defined as a value between 0 and 2. This is useful for avoiding false self-shadowing artifacts. See Shadow troubleshooting for more information. This is set to 0.05 by default.
Shadow Normal Bias
Use the slider to control distance at which the shadow casting surfaces are shrunk along the surface normal, defined as a value between 0 and 3. This is useful for avoiding false self-shadowing artifacts. See documentation on Shadow mapping and the bias property for more information. This is set to 0.4 by default.
Shadow Near Plane
Use the slider to control the value for the near clip plane when rendering shadows, defined as a value between 0.1 and 10. This value is clamped to 0.1 units or 1% of the light's Range property, whichever is lower. This is set to 0.2 by default.
Recommended Shadow Settings
- Shaders -
First step is to not use the default Forge or Koikano shaders in Studio, they are very limited in how they react to light sources (ex. you can't use MODLIGHTs with them)
Vanilla Plus (V+)
V+ is like the default shaders, but better. It reacts to MODLIGHTs, has more sliders, and reacts to Scene Effects.
It works with P-lights, but the way it handles shadow interaction is not realistic (things don't cast shadows on other things, except maybe the map).
Koikatsu Unity Toon Shader (KKUTS)
A big part of my KKUTS knowledge comes from pizdatyi's guides (also check links in description). He is working on the shader, so follow him to be updated
I think of the more advanced shaders like KKUTS and Az as "true lighting" shaders. The effect will be heavily dependant on lighting and is not affected by System->Scene Effectsas much as V+. It also has realistic shadows.
Left: V+, affected by presets, fake shadows
Right: KKUTS, less affected by presets, real lighting and shadows
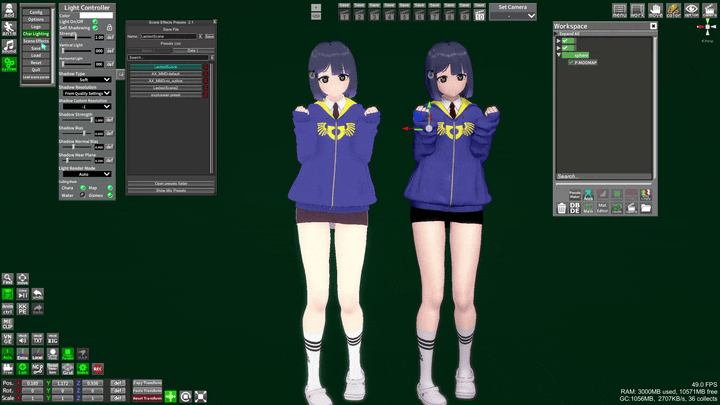
But it doesn't mean it can only produce a "realistic" or 3D look. It can make one or the other, depending on how you set it up
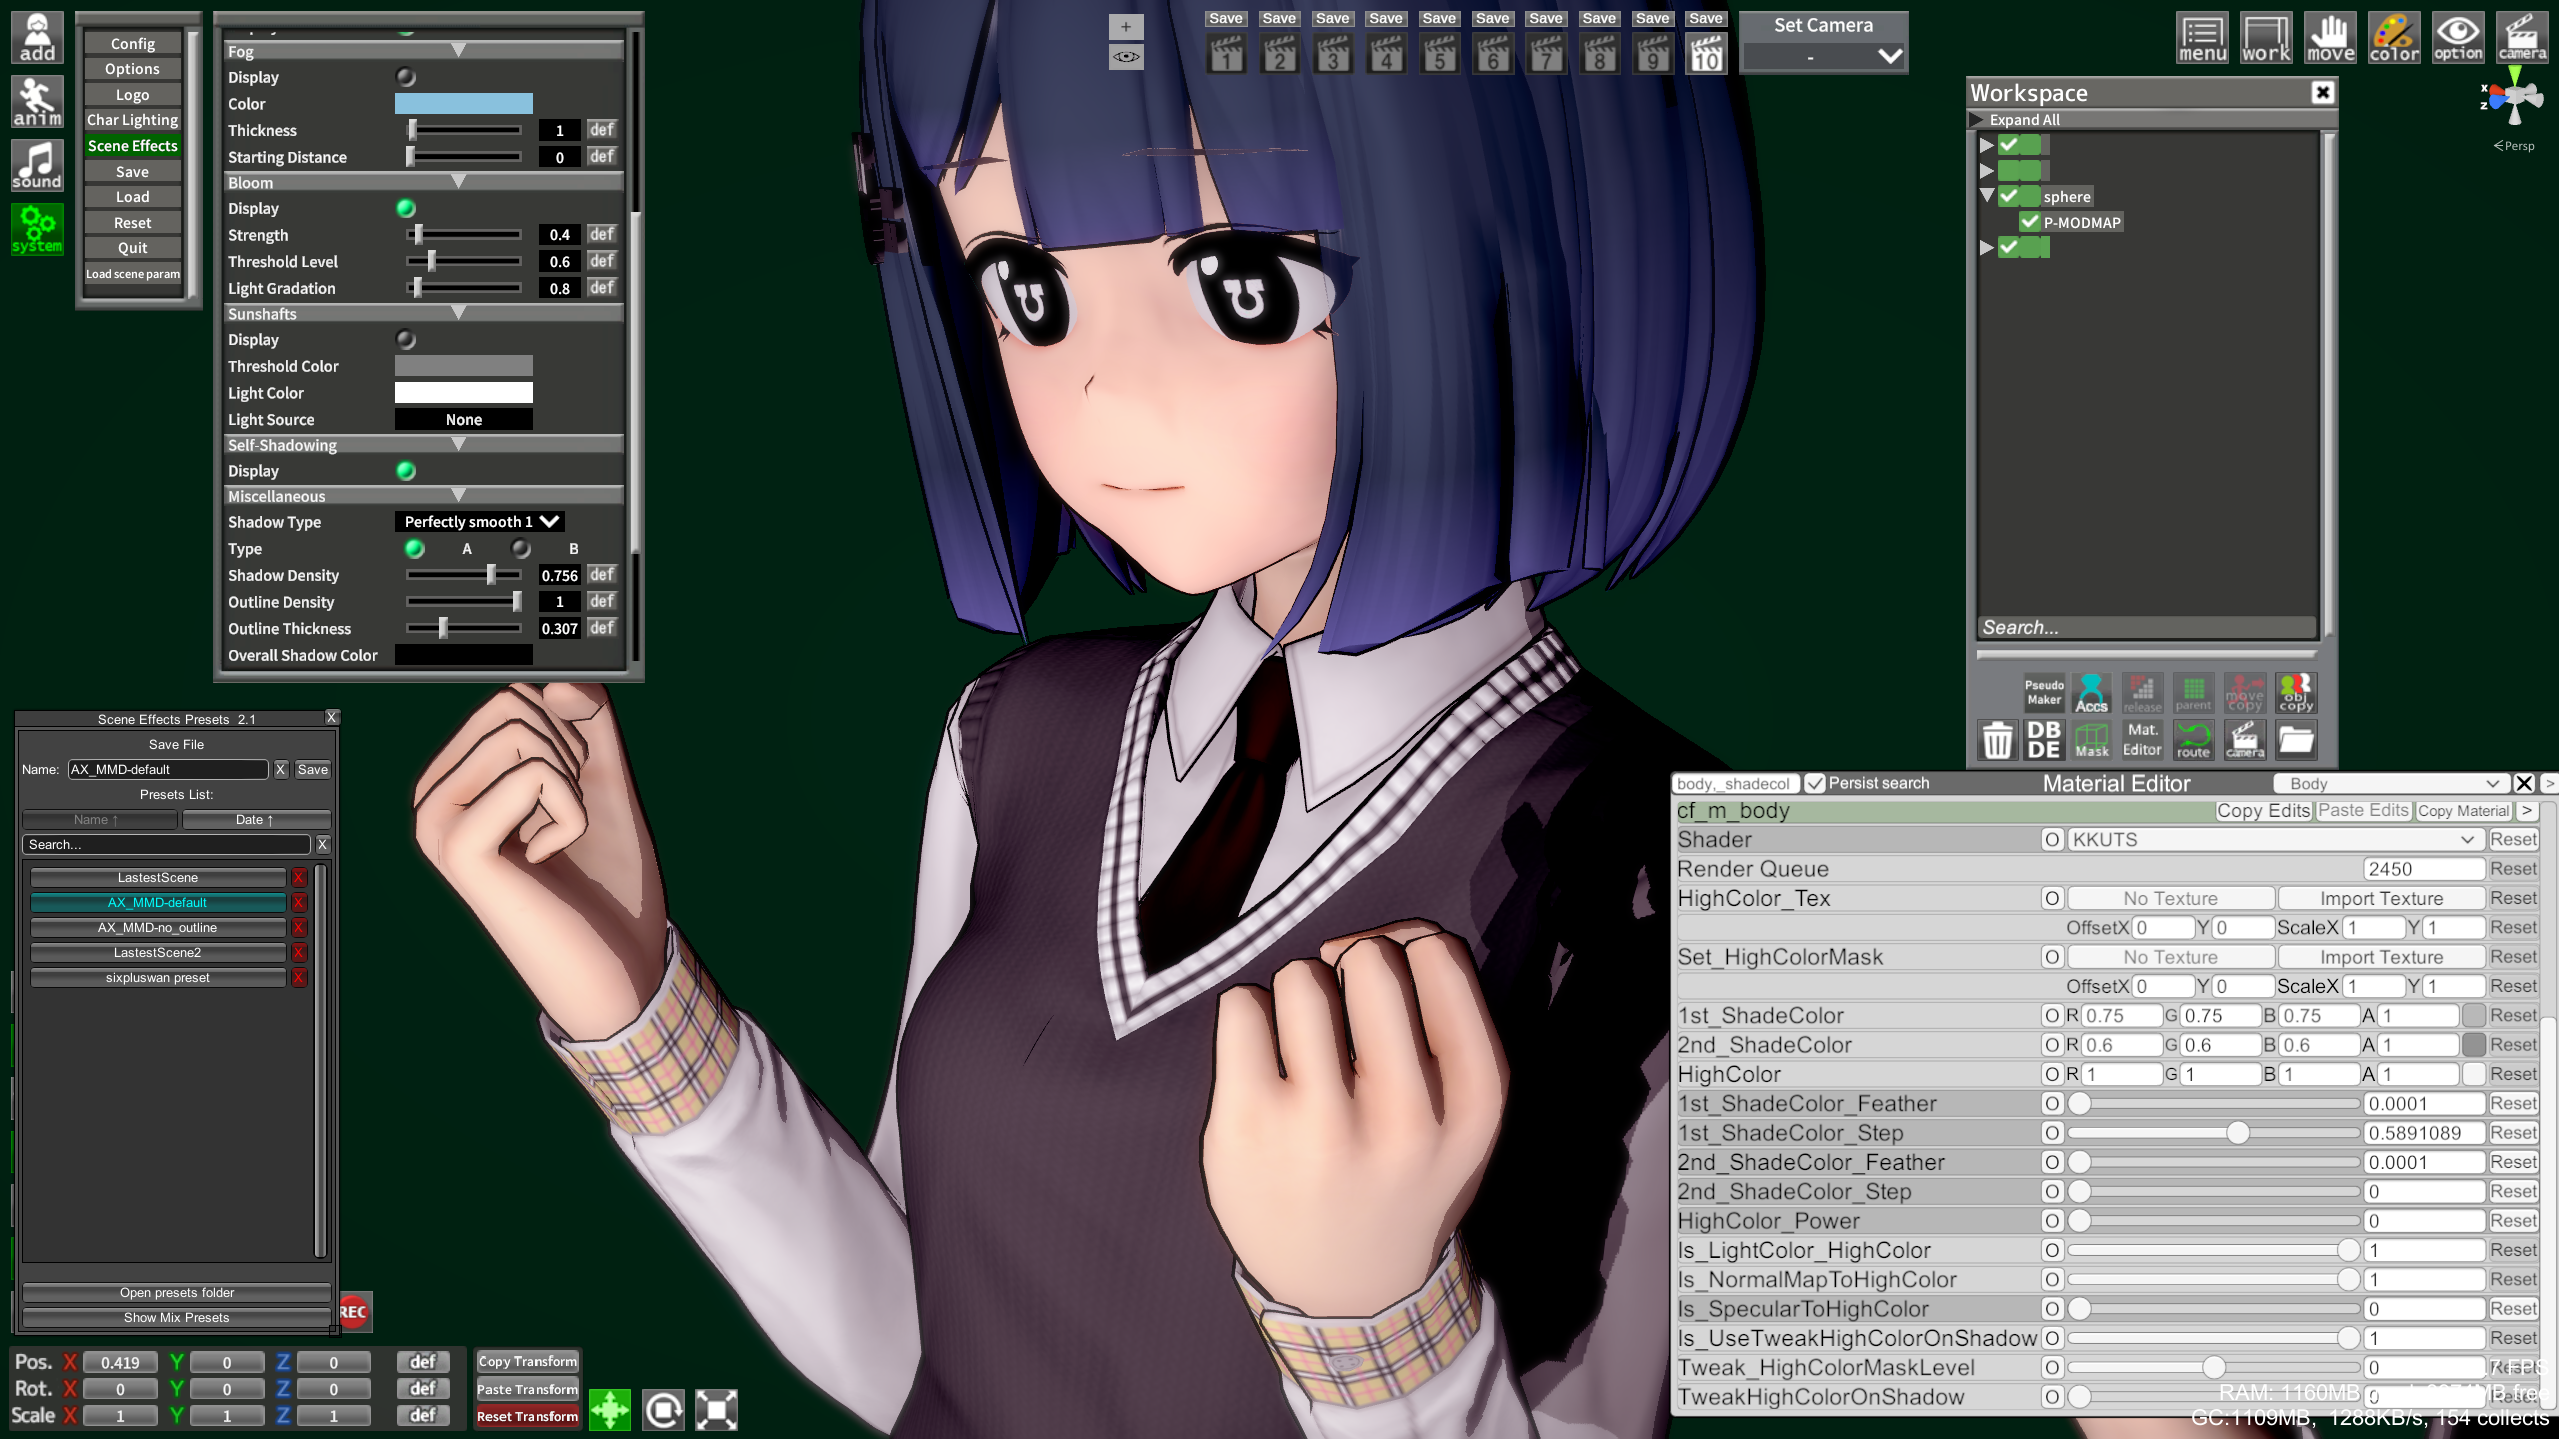
For a flat look, hard shadows with low HighColor and Specular, outline in preset:
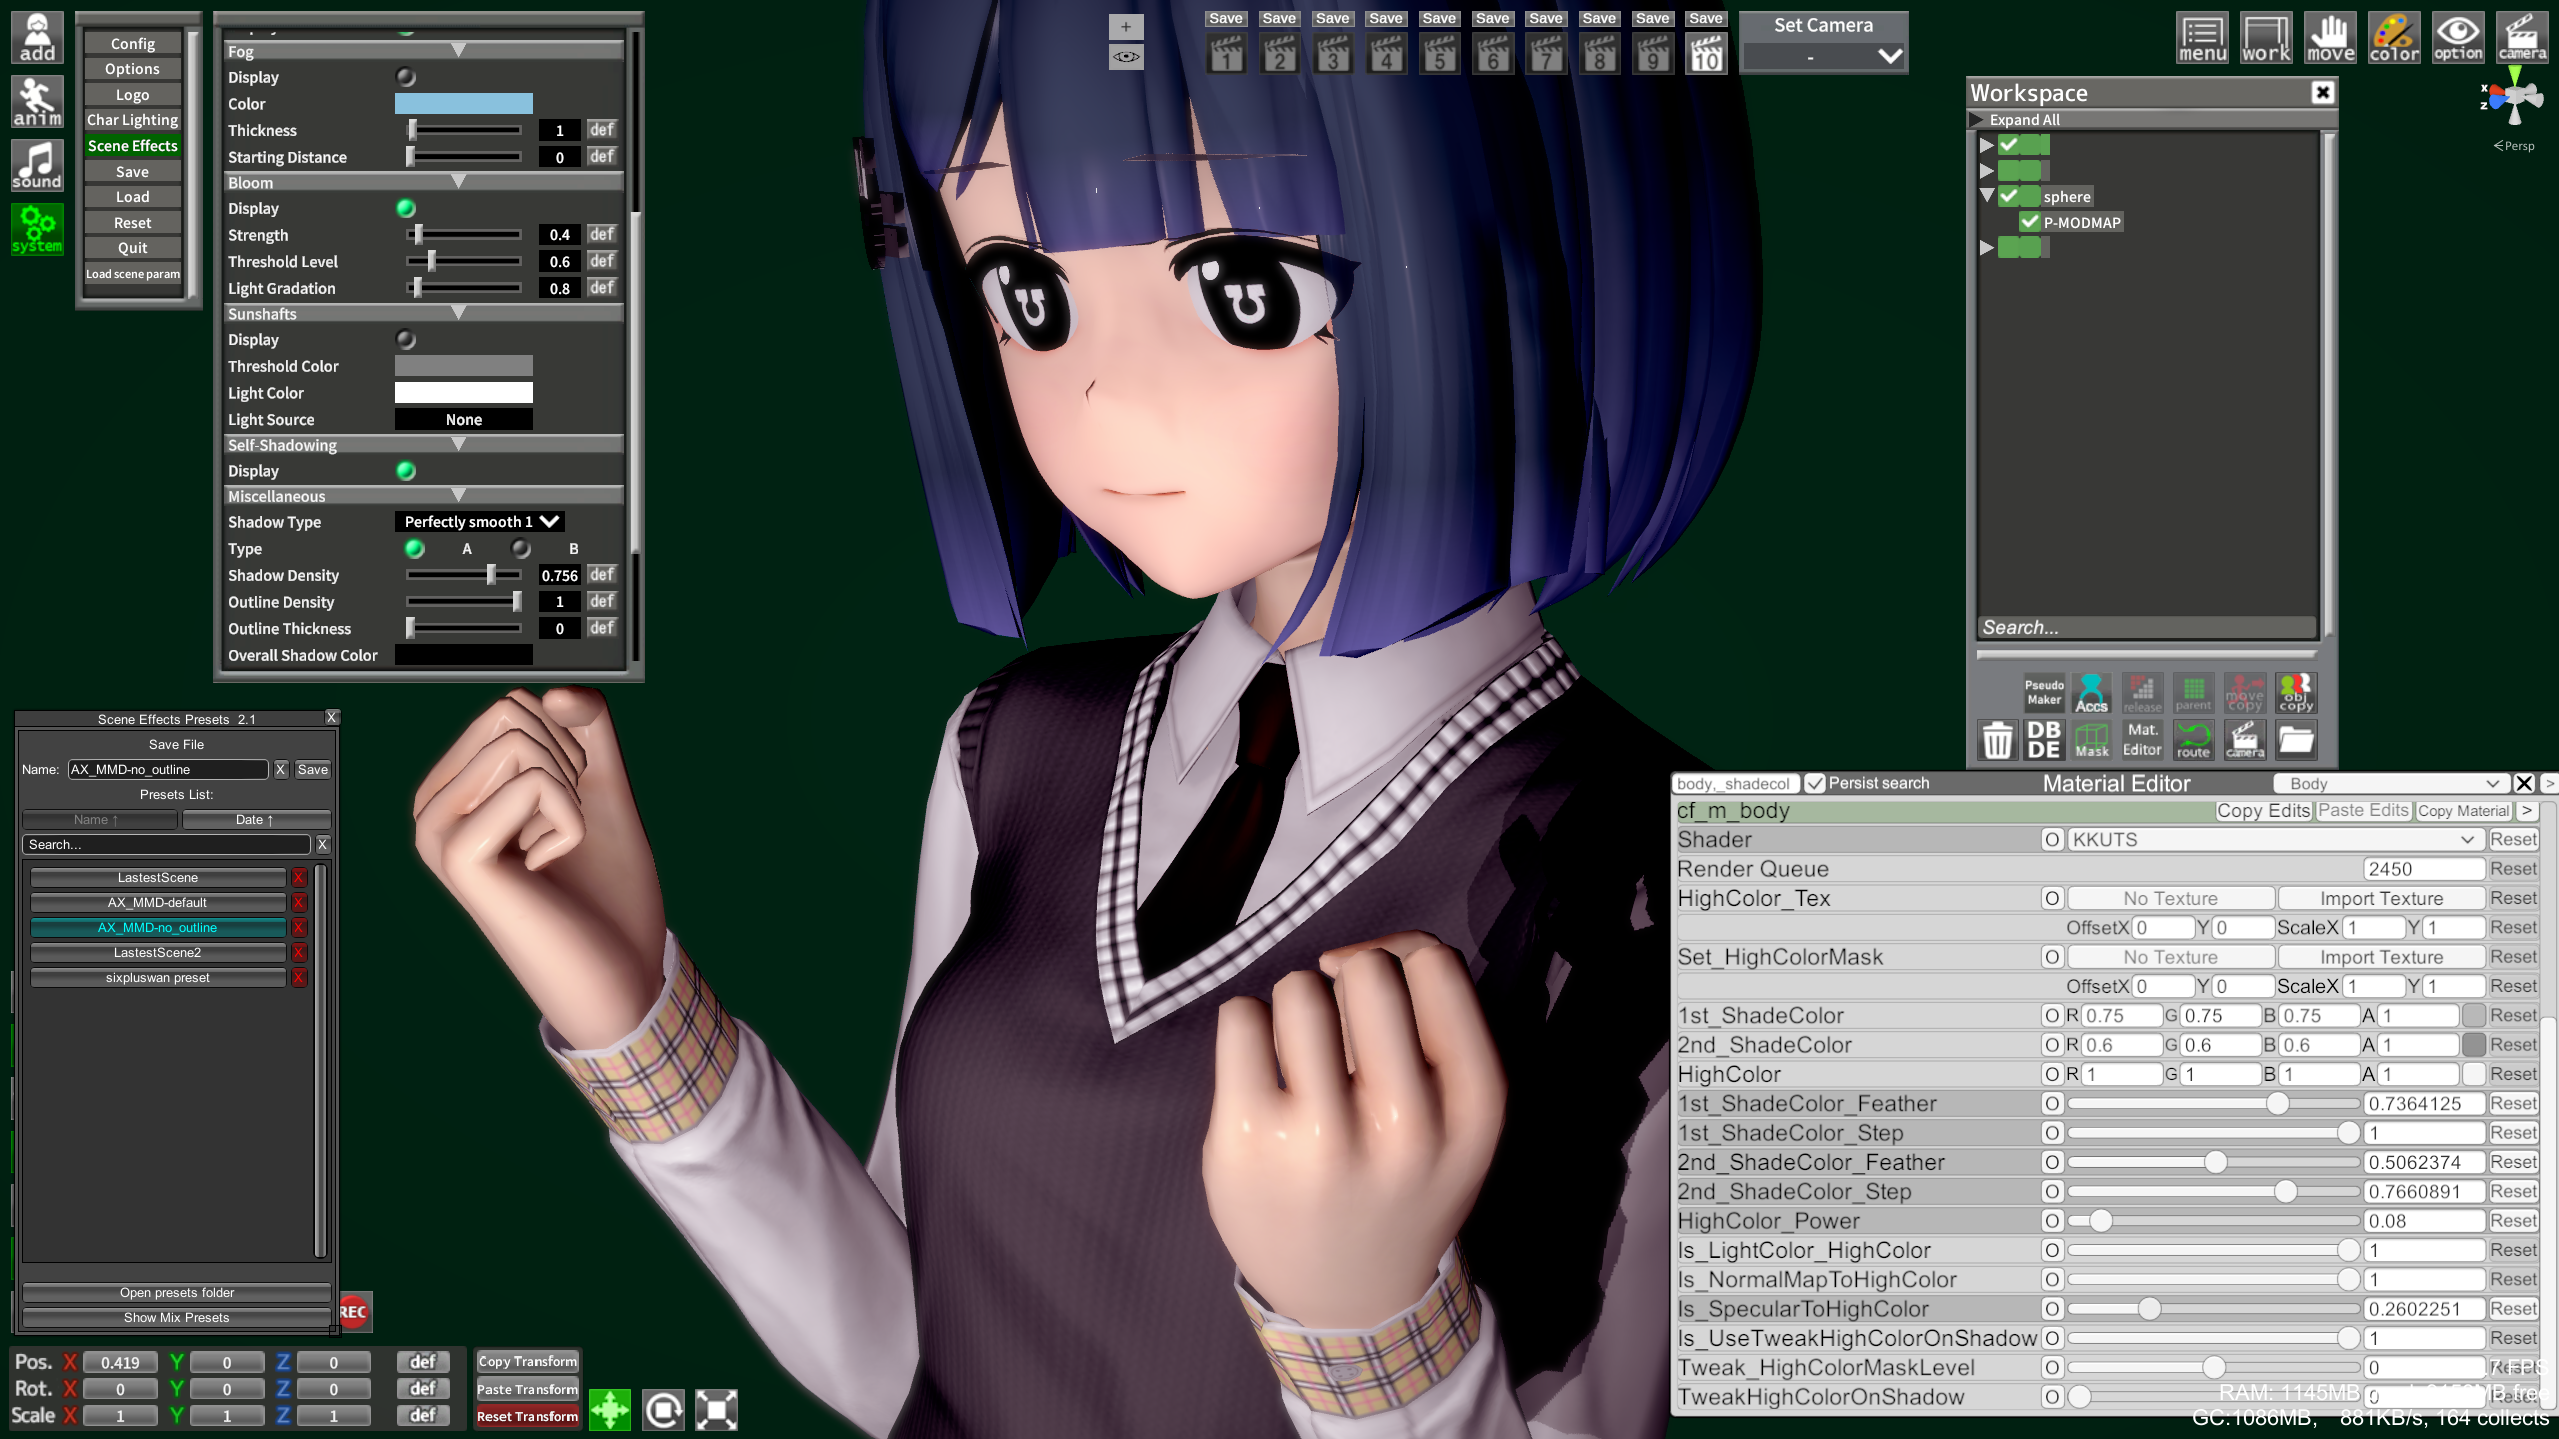
For a more 3D look, smooth shadows with some HighColor and Specular, no outlines:
Az Standard (Az)
If you want to go for the full 3D look and make content that looks like it was made in Blender, this is the shader to learn. It requires more advanced knowledge in general and having good textures makes all the difference.
This is how it looks by default, with no alterations and 1 point light (Character Lighting disabled)

And here's a character I made using it, with a lot of work spent on adapting textures and NormalMaps
- Technical documentation
- Guide on textures and how to adapt them to the Az Standard shader
- Link to get to Acezen's Discord, there are some resources there and creators using the shader tend to be in the server.
Here's a video of my shading process with Az for characters:
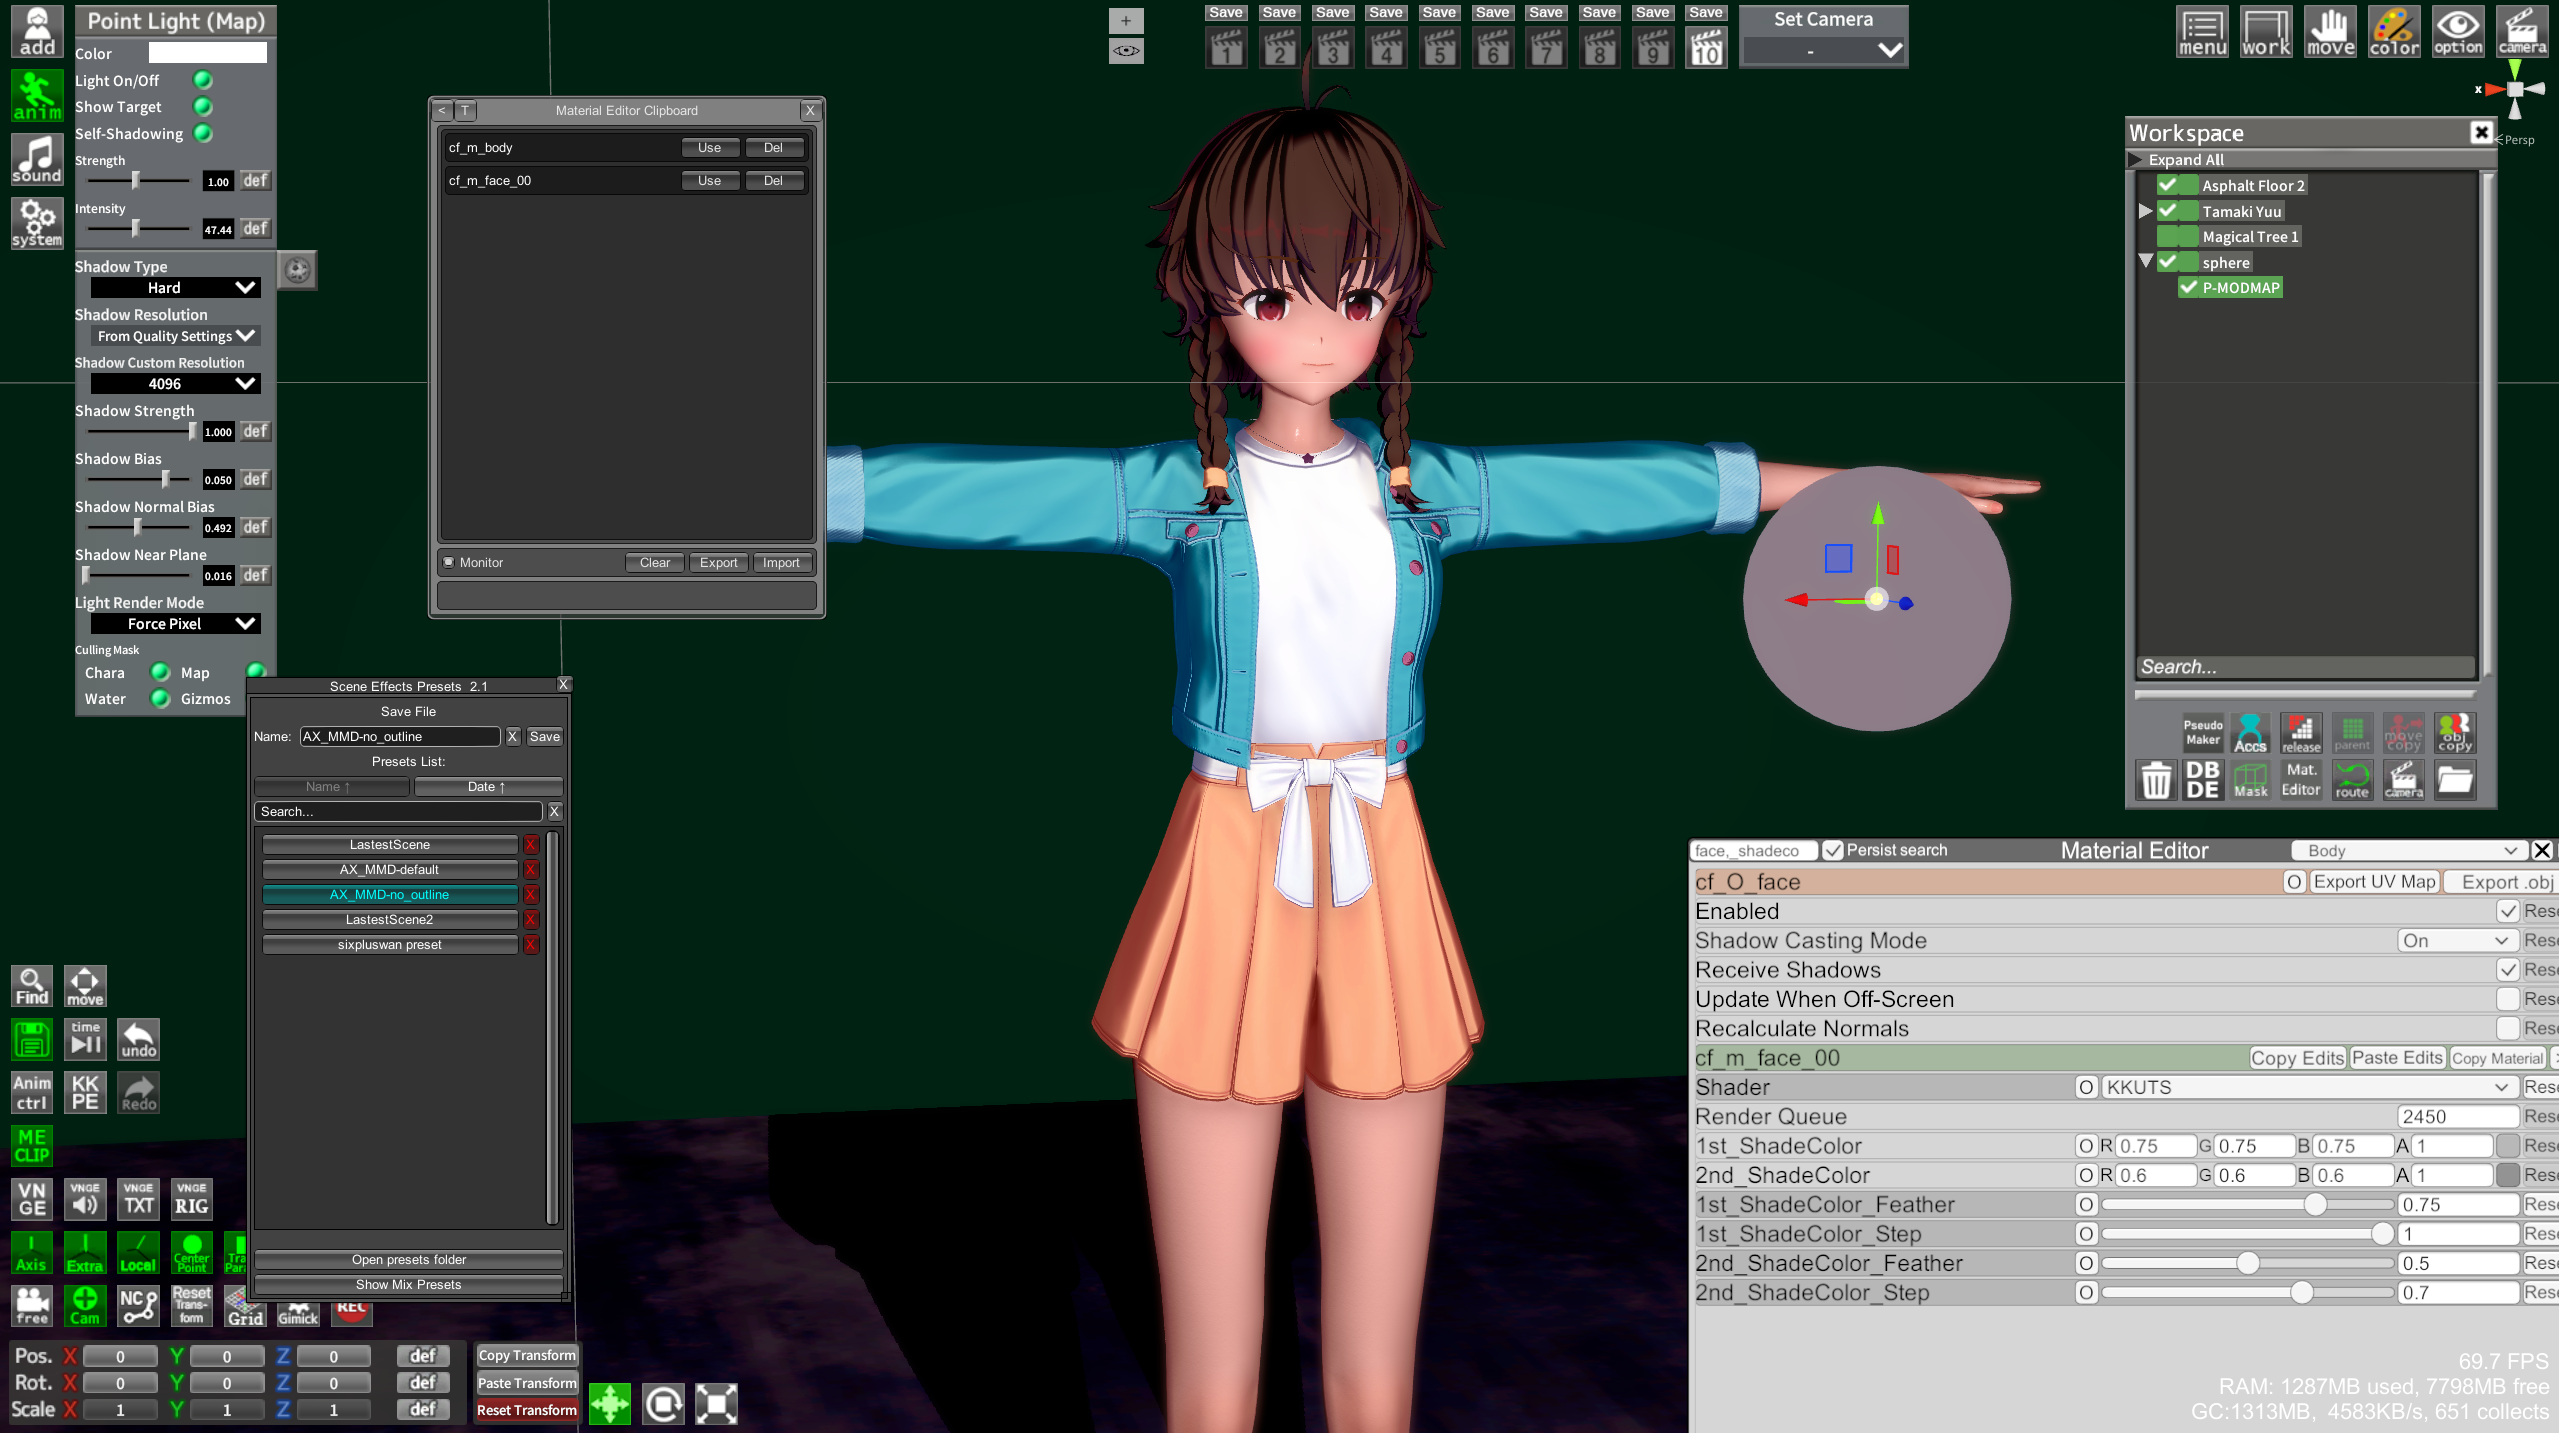
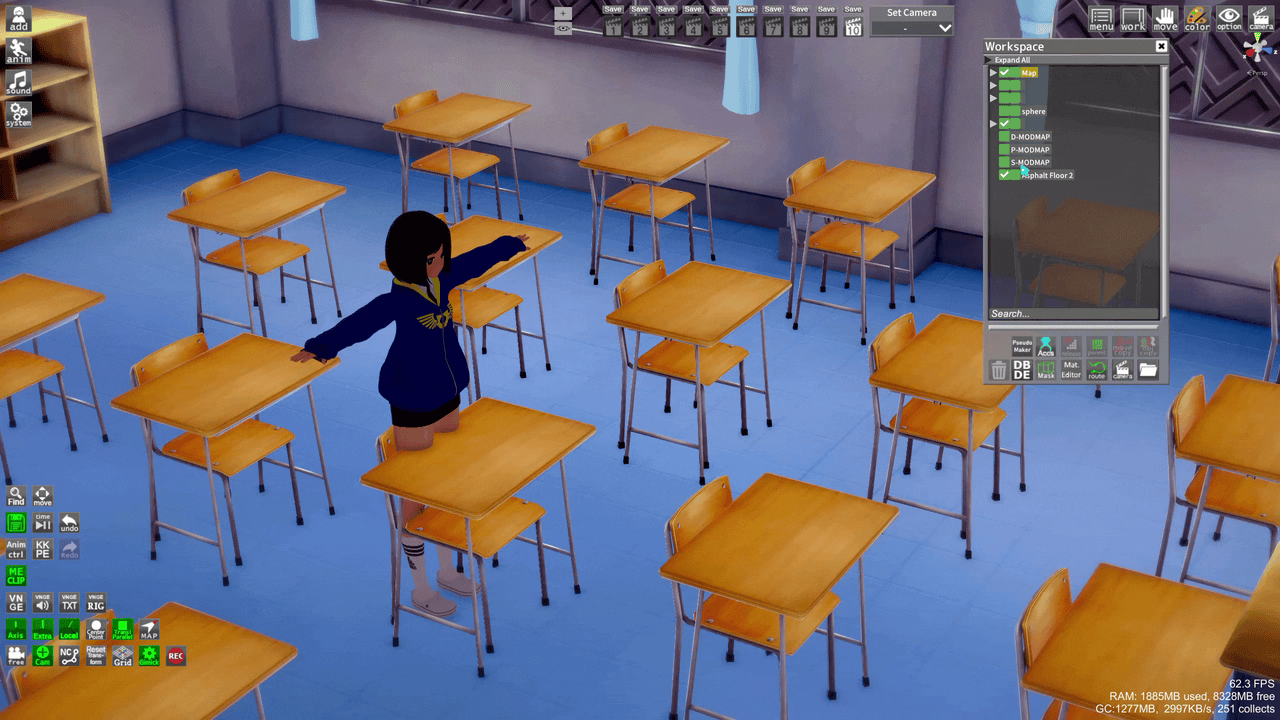
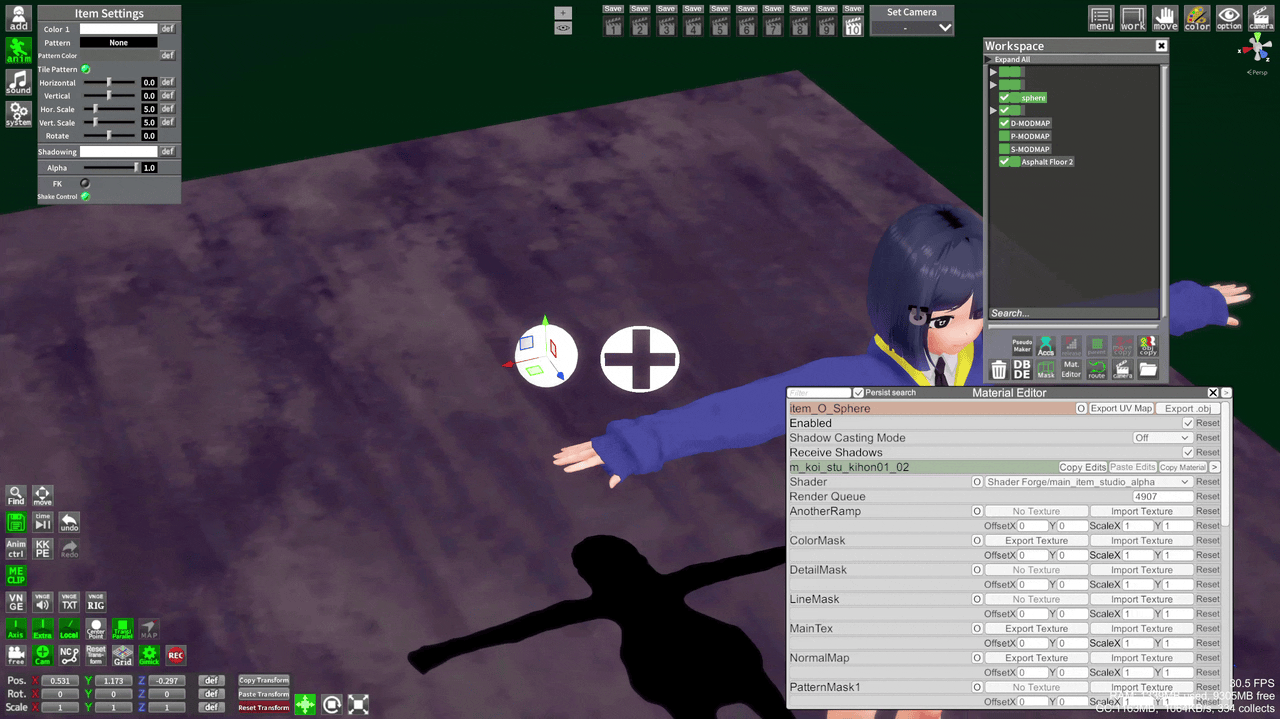
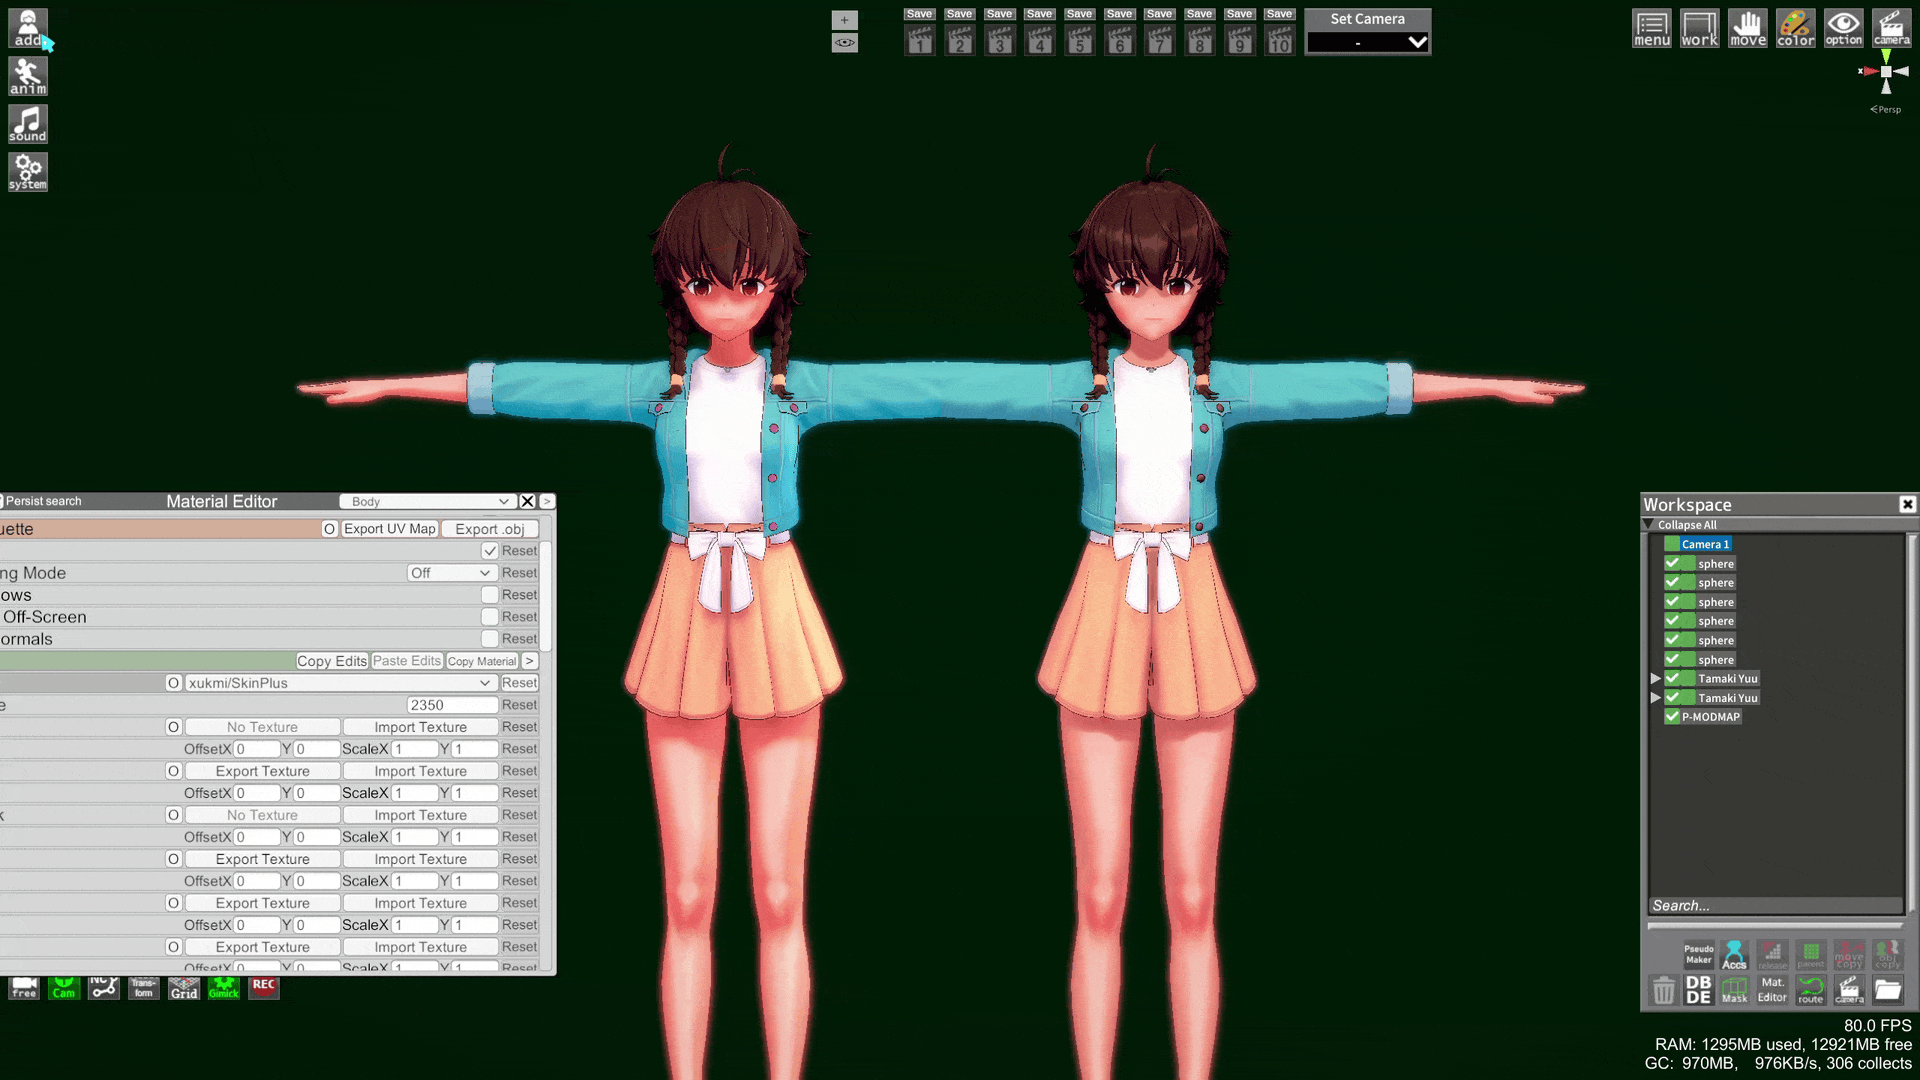
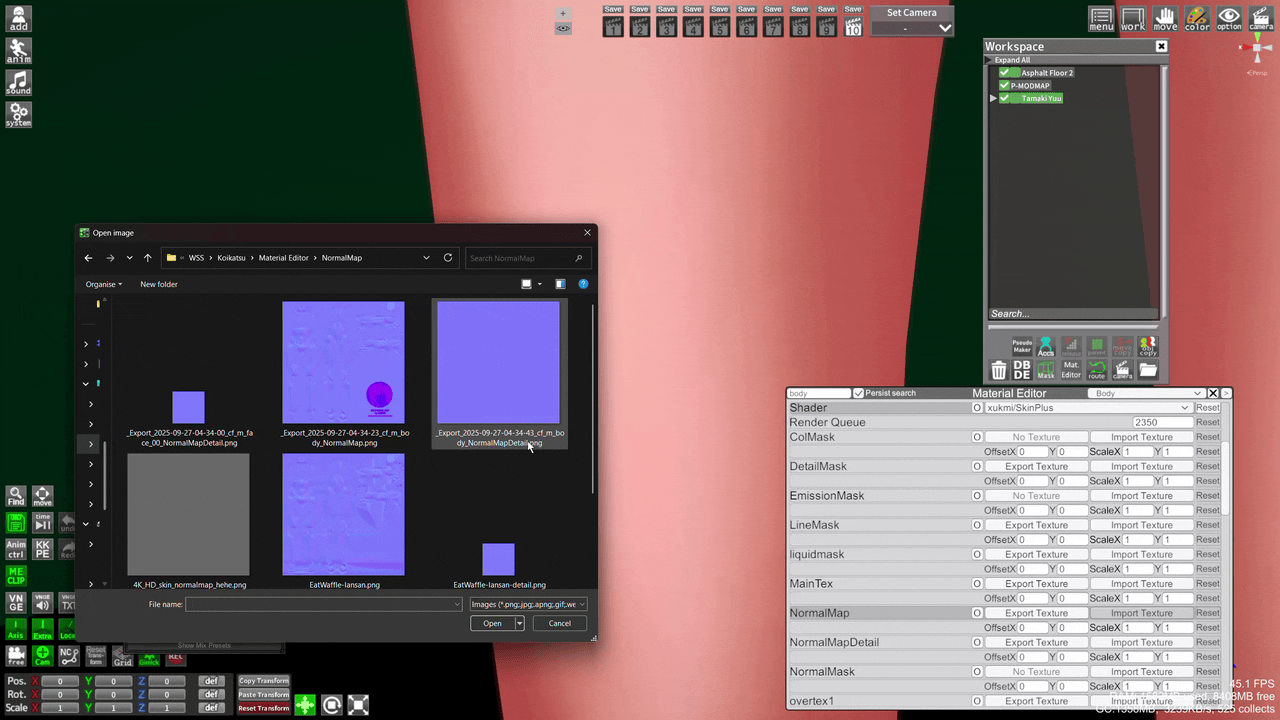
- Material Editor -
I showed this menu in the last few screenshots without going over it. Material Editor (or ME for short) is the main tool you will use to alter shader settings and texture on an object.
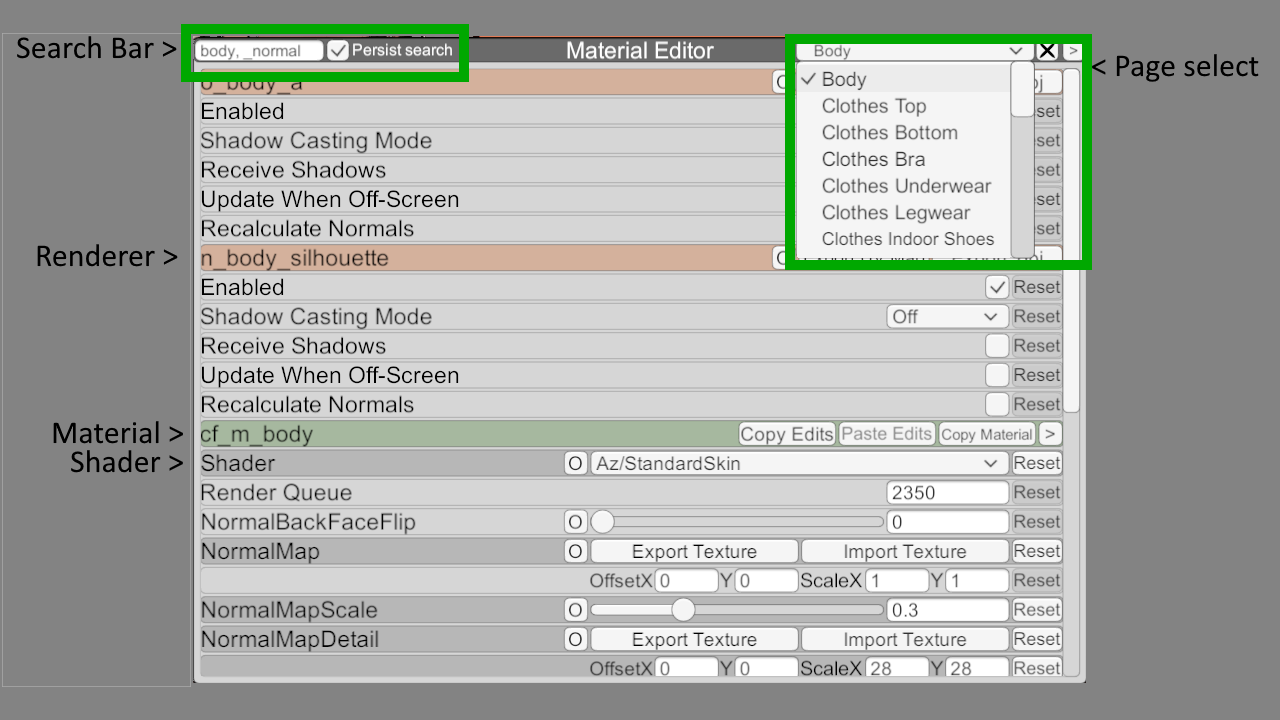
At the top of the page are the renderers (peach color), each renderer can be related to multiple materials (green color). After that comes the materials where most of the settings are. This is where you select the shader, shader settings, and textures.
In the header you have a search bar on the left, you can filter by material (ex body) or by property keyword with _ prefixed to it (ex _normal for NormalMap related properties). You can use multiple filters by adding a comma , between each.
On the right you have the page selector. Items usually only have 1 page, but characters have multiple: 1 for body, 1 per clothing section, and 1 per accessory.
Here is a tutorial by Discord@wusby:
Some settings of CharaMaker are reflected in here, which means any edits made in ME will take precedence over it. For example Skin Type and Skin Type Strength will correspond to the NormalMap and NormalMapScale of the body material in the Body page. Some Makeup settings like the lips stick usually correspond to one of the overcolor and overtex fields.
A common one is the Iris, if the MainTex texture property of the hitomi material is edited, it will overwrite the iris selected in Maker.
Important to know: If you reset a texture, you must reload the object (save/reload chara, change outfit, ObjCopy in Studio)
Extra tools
These plugins will make your life easier when swapping shaders and doing edits in batches:
Here I use KKUTS shader as the example for the swaps and slider adjustments
Mass Shader Editor (MSE)
Keybind: M
Allows you to edit multiple Material Editor properties at once.
Enable character changes in the settings (cog icon), then open ME and click on a property name to auto select it in MSE. On top of the property name you can add a filter to limit what should be affected by the change. For more info, click the ? icon in the MSE menu and read the tutorial.
ME Clipboard
Keybind: It is a button
Every time you use Copy Edits in Material Editor, it adds an entry to the clipboard. You can Export/Import clipboard data files
Shader Swapper
Keybind: Ctrl+P and Ctrl+Shift+P
Quick way to change the shaders of every materials based on a config file. Select the config in the F1 menu, VanillaPlus (V+) by default.
Ctrl+P will not change shaders if they are not the default ones, Ctrl+Shift+P will force the change. After selecting a config left click inside Studio to make sure it is in focus, otherwise using the keybind will not work.
I made a few config files here to convert any shaders (or at least the most common ones) into another specific shader, you can store them anywhere and select one from the F1 menu.

ShaderManagementTool
Keybind: Must be set in F1 menu
- Textures -
This is a whole other subject, and it can have a significant effect on how your character looks
NormalMap and NormalDetailMap, DetailMask, Shading Maps, Overlays and Underlays (Charamaker/StudioPseudoMaker only), lots of things that can accentuate/hide features of the character, give more details, or give you more control over the shading
(A few examples)
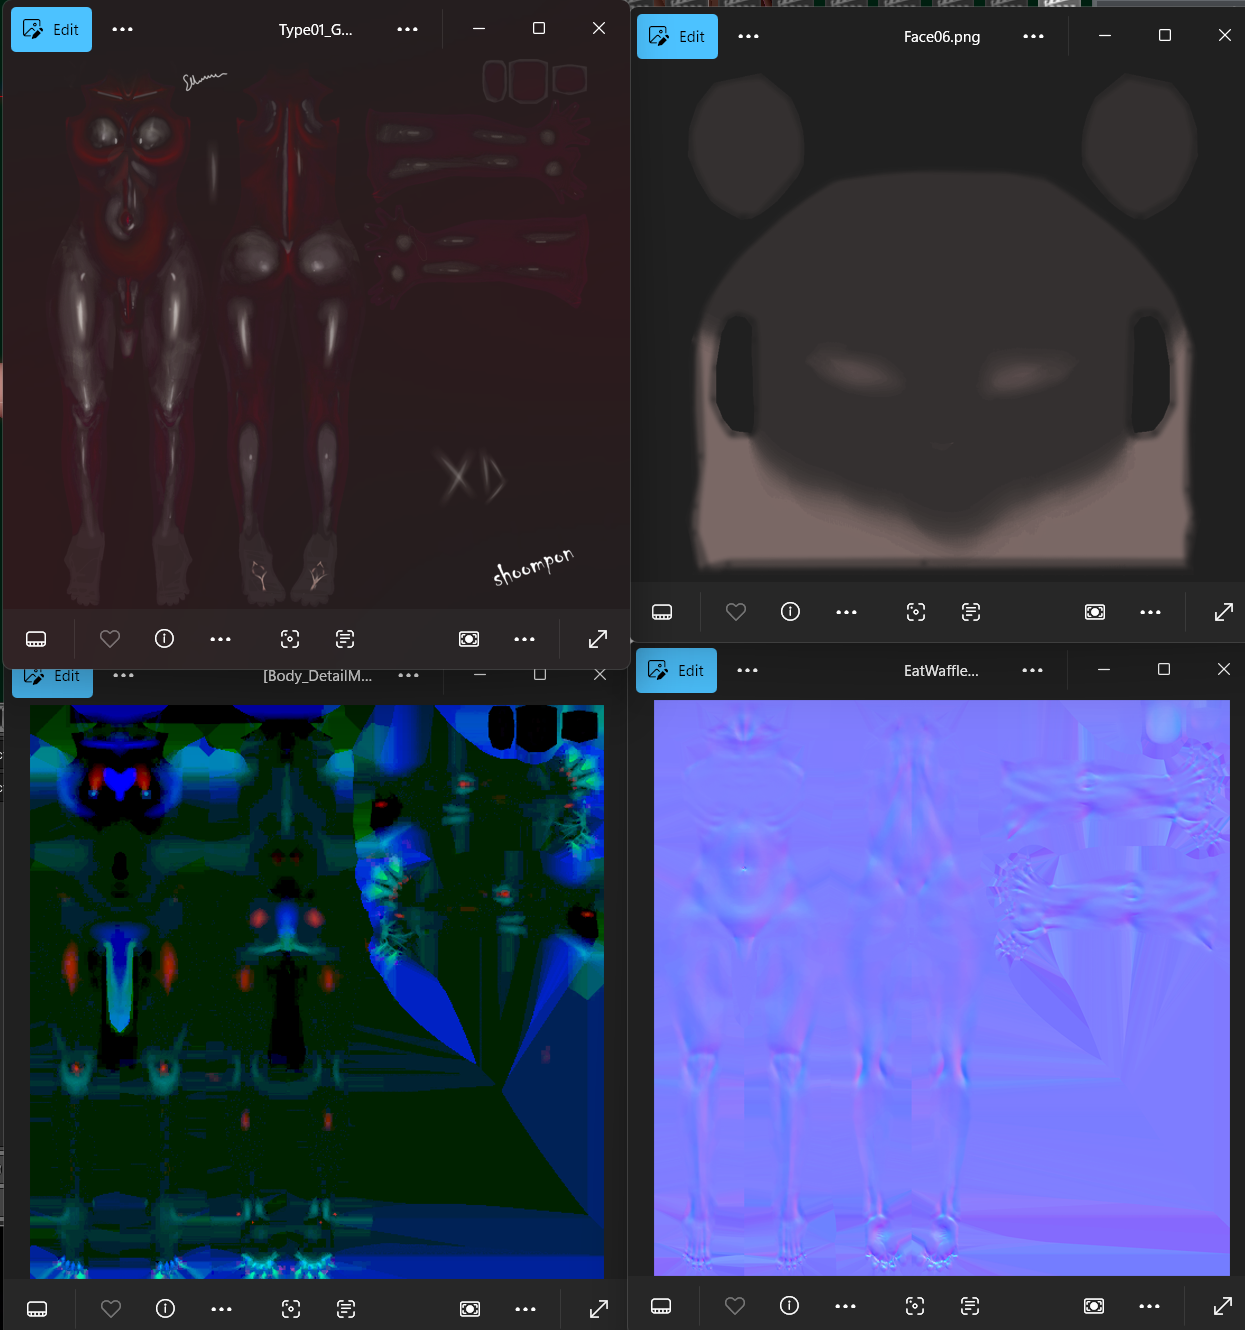
BodyOverlay - FaceOverlay
BodyDetailMask - NormalMap
Pizdatyi has some guides on different subjects
This Az Standard Shader guide has some good info about NormalMaps and other textures that add depth to a character/outfit
You can also explore the Sharing Site channels on Discord to get materials, such as this 4k NormalMap from #material-sharing that allows you to add basic skin pores
- Quick preset -
A quick basic lighting setup to try things out:
Scene Effect and MEclipboard presets
- V+ to start, Ctrl+P to convert any default shaders
- Load a scene effect preset, I like a softer 2.5D look (things don't need to be 100% anime OR 3D)
- Load KKUTS skin presets with some textures included, or start with the
ShadeColorKKUTS sliders - Add some MODMAP lights and lower or disable
System->Chara Light - Tweak shadow settings in
System->Chara Lightor theanimtab of your lights.
- Extra resources -
An online guide by Discord@docmurphy, there is some overlap with things I said already but it covers a wider range of subjects and is more in-depth (such as individual sliders).